When the first hard freeze comes and the perennials turn to mush, do you dread the upcoming gardenless winter months?
Are houseplants just not enough to satisfy a craving for dirt under your fingernails, not to mention baskets of fresh veggies and fragrant blooms?

We link to vendors to help you find relevant products. If you buy from one of our links, we may earn a commission.
If this sounds like you, there’s a solution: A hoop house for extending the growing season straight through winter and then jumpstarting summer plants.
In this article, we’ll discuss what a hoop house is and offer 11 tips for successfully installing and using one – or more – in your outdoor growing space.
Here’s what we’ll cover:
Tips for Gardening in a Hoop House
Let’s get started, before the snow flies!
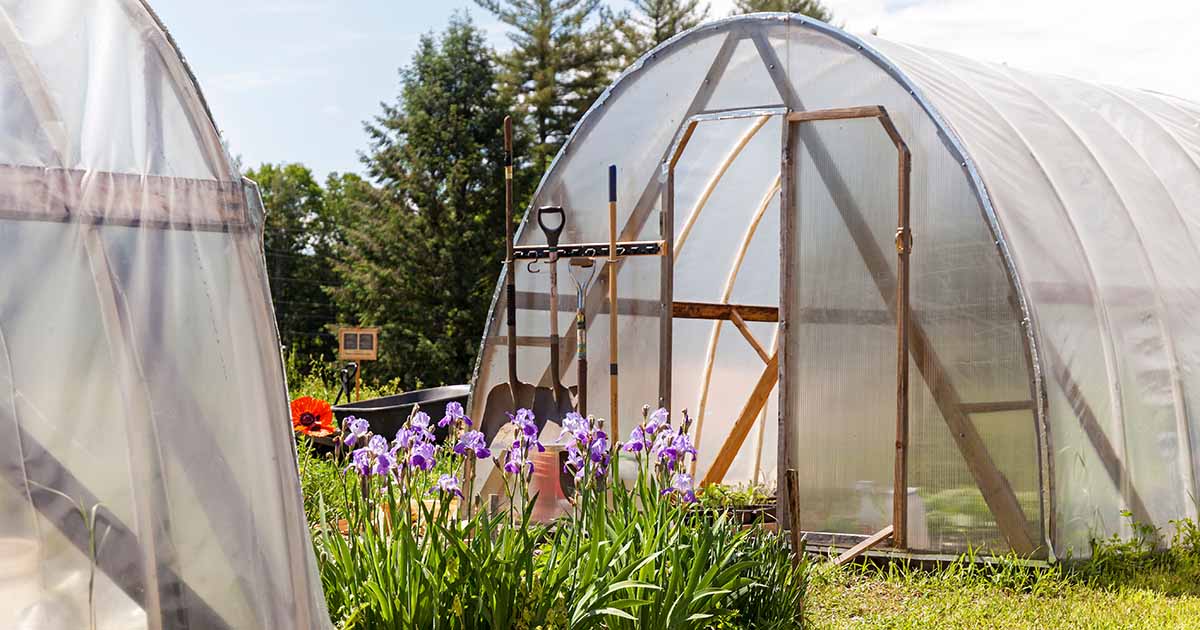
What Is a Hoop House?
A hoop house, aka polytunnel or high tunnel, is a semi-permanent greenhouse that uses the sun’s energy and natural airflow to heat and cool it.
It’s made of steel tubing and covered with polyethylene through which the sun’s light and heat may pass.

The ability to warm the interior air, soil, and plants enables farmers as well as home gardeners to extend the growing season, by cultivating cool weather crops after the first fall freeze and sowing seeds for warm weather plants before the last spring frost.
Cultivating in a hoop house is also helpful in reducing exposure to pathogens and pests.
There are two hoop house styles: half-round, like a Quonset hut, and peaked, in Gothic or arched fashion.
The half-round hoop house is generally shorter and more resistant to tearing. The peaked type is taller, with more room for larger plants along the sides. However, its angular construction makes it more susceptible to plastic tearing, especially during snow removal.
Both hoop house styles are rectangular, with a door at each gable or short end.
The sides generally drop down, roll up, or have vent flaps. Opening and closing the doors and/or vents facilitates temperature regulation and wind resistance.
The most basic hoop house setup has in-ground plants and no mechanical devices like fans, heaters, or irrigation. It is a mobile arrangement to dismantle and move as needed for crop rotation and soil replenishment.
Some growers add features like cooling, heating, propagation tables, raised beds, and irrigation to their hoop house. Others grow in containers.
And while there is no right or wrong regarding the contents of the enclosure, the more you add, the less mobile and more permanent your structure will be.
There are numerous hoop house kits and DIY instruction manuals available. Materials vary but generally include the following:
- Assorted hardware like anchors, brace bands, cross connectors, endwall brackets, girt and purlin clamps
- Steel eave struts, ground posts, ridge poles, purlins (horizontal roof framing), and girts (horizontal wall framing, aka sheeting rails)
- Baseboard, door framing, and ground skirt lumber
- Crank and support hardware for roll-up or drop-down sides
- Gusset-folded UV-resistant greenhouse-grade plastic polyethylene with a life expectancy of at least 4 years
- Single or double aluminum channels and spring wire
Products vary in purpose, quality, size, and style. Read all descriptions and reviews carefully.
When you receive a delivery of parts or an entire hoop house kit, take an inventory and read all instructions before beginning the assembly process.
Products to Consider
Here are three products to consider:
The Amerlife Extra High Large Walk-In Tunnel Greenhouse measures 10 by 20 by 7.5 feet. It has a galvanized steel frame and four cable-stayed pipes for stability.

7.5 Feet Extra High Large Walk-In Tunnel Greenhouse
The green polyethylene is a UV-resistant three-ply product with a woven center grid and a 140 g/m thickness, or 1.4 mils, which is .0014 of an inch thick.
This option is available from Amerlife via Wayfair.
The GrowIt Heavy-Duty 12 x 20 Walk-In Greenhouse is a ready-to-build peak-style kit.
It contains a one and five-eighths-inch steel tube frame, 30-inch anchors, ShelterLock® stabilizers, ratchet-tight tensioning, and an Easy Slide crossrail system for a stable and durable product.
The peak height is 8.6 feet, by 12 by 20 feet in width and length.

GrowIt Heavy-Duty 12 x 20 Walk-In Greenhouse
The opaque poly cover diffuses light for optimal exposure and greenhouse heating.
It is triple-bonded, UV resistant, and waterproof. There are roll-up side panels and half-moon screen vents at each gable end for ventilation and temperature regulation.
The GrowIt Heavy-Duty 12 x 20 Walk-In Greenhouse is available from Tractor Supply Co.
And here is a customizable hoop house kit:
The High Tunnel Greenhouse Full Kit allows you to choose a round or arch style. Note that the arch style costs considerably more.
The round is available in widths ranging from eight to 38 feet. Lengths are 32, 40, or 100 feet. The height for all is 13 feet.
If you select the arch style, widths are 18 to 34 feet, lengths are 32, 40, 80, or 100 feet, and the height for all is 12 feet.

High Tunnel Greenhouse Full Kit from ShelterLogic
Kits include galvanized steel framing and end panels, and opaque 5.5-ounce UV-resistant and waterproof polyethylene, a flexible product with a woven core and a thickness that translates to about 10 mil or .010 inch.
Thirty-inch base pipes and ShelterLock® Stabilizers ensure stability.
The High Tunnel Greenhouse Full Kit is available from ShelterLogic.
Because of its opacity, polyweave greenhouse plastic diffuses light, unlike a non-woven clear product that lets light pass directly through. We’ll learn more about this shortly.
Note that polytunnels are susceptible to tearing and collapse in high winds. The wider the tunnel, the more likely it is to suffer from the weight of rain and snow.
A narrower tunnel, taught plastic, a windward-side windbreak of trees – far enough away not to cast shadows on the hoop house, venting, and ground braces aid in avoiding damage.
Read on for 11 tips for success.
11 Tips for Installing and Using a Hoop House
Below are 11 tips to remember as you embark on your first hoop house gardening adventure!
1. Avoid Treated Lumber
Hip and baseboards run parallel to each other along the sides of a polytunnel and add structural support. The hip boards are generally four to six feet above ground and the baseboards are at ground level.
They may be plastic, steel, or wood. Hip boards are handy for attaching drop-down or roll-up sides or propagation tables, and baseboards help to contain the soil.
When selecting a kit or materials to build your own, avoid lumber treated with preservative chemicals that can leach into the soil and make their way into your plants.
Preservatives can also have a deteriorating effect on the polyethylene they come in contact with. And if you are applying for organic certification for crops you grow and sell, the preservative content may disqualify you.
2. Check Your Zoning Laws
In some regions, structures of a specific size require anchoring in concrete.
It’s best to find out before you prep the soil, build the polytunnel, and plant. You no longer have a moveable structure once you sink the ground poles in cement.

If you plant in the ground, this means that instead of rotating to a new location to let the soil rest every few years, you will have to enrich the soil with organic amendments like compost and humus.
Depending upon the size of your tunnel, access doors at either end may need to be enlarged to easily accommodate large equipment, like tillers and wheelbarrows.
3. Choose a Full-Sun Location
The object of any greenhouse structure is to create a bright, warm growing environment. Evaluate the proximity of trees, shrubbery, and buildings before choosing a location.
If evergreens are close enough to cast shadows, light penetration is reduced. On the other hand, if you have a stand of evergreens at a distance with no unwanted shadowing, they can serve as a beneficial windbreak and snow deflector.
If deciduous trees and shrubs that lose their leaves in winter are nearby, their shadows may be minimal, and they may also help to reduce the impact of wind and snow.
Similarly, buildings that cast shadows are detrimental, while those at a non-shadowing distance offer wind and snow protection.
4. Double Insulate in the Coldest Regions
One feature to consider, especially in the coldest growing zones, is installing a second layer of plastic and a double-layer inflation fan or air pump kit.
With an electrical source, you can add this type of blower fan. Consider opting for one with a damper to regulate the cubic feet per minute of airflow, or CFM, as desired.
In addition to increasing the ambient interior temperature, the double layer fan system improves structural integrity; increases the insulation, snow load capacity, and wind resistance; and reduces condensation.
Condensation is a sign of excess humidity. It breeds pathogens and is undesirable in a greenhouse setting.
Instead of standard clear greenhouse plastic, some folks use a type called IRAD, or infrared anti-drip, that retains more heat and inhibits condensation. They use IRAD underneath and a transparent plastic layer on top.
Other folks use two layers of clear, and some use a polyweave layer underneath and a clear layer on top. Polyweave is opaque and diffuses light, delivering it to all parts of the plants, including the lower leaves, facilitating optimal photosynthesis and even greenhouse heating.
The plastic on top of a polytunnel is anchored by a spring wire that fits into a metal channel.
To double insulate, cover the first layer of plastic with a second, securing it in the same channel lock. Then, install the blower fan to inflate the space between them.
Experience is the best teacher. Over time, you’ll decide if double insulating is necessary and choose the best method for you.
5. Install Polyethylene on a Warm Day
Once your structure is built, choose a warm, dry day with no wind for installing the plastic covering.
Pull it over the tunnel along the ridge pole from one gable end to the other. Let first one side, and then the other unfurl until the sides are covered lengthwise.

Videos abound on the internet showing techniques for installation. One successful strategy is to roll the two sides of the plastic inward and bind them with rope.
Start at one gable end, pull the rope across the ridge to the other end, remove the rope, and unfurl the plastic over the sides.
Once in place, pull the plastic gently downward to stretch it as you secure it with the spring wire in the side channel. When the weather cools, the plastic tightens for a sag-free fit.
Use similar pressure when applying plastic to the side doors on the short gable ends of the tunnel.
6. Make the Most of Passive Ventilation
To create airflow, growers must open the interior to the outside using drop-down curtains, gable doors, ridge flaps, roll-up sides, side flaps, or a combination of openings.

Natural ventilation is cost-effective, efficient, and quiet, unlike a greenhouse cooling system that uses an evaporative pad and fan, requiring electricity, creating uneven cooling, and generating noise.
When a two- to three-mile-per-hour wind blows, the vents facing into the wind draw cool air in. The air passing over the ridge creates a vacuum on the “leeward” side away from the wind that forces the hot air out. The result is even cooling for all plants.
Many growers prefer side vents, ridge vents, and drop-down curtains because they cool the air from above rather than placing the plants below in the path of a draft.
As the air falls, the temperature changes gradually, avoiding shock and a growth slowdown.
In addition to cooling with ventilation, wetting the soil in a greenhouse reduces the ambient temperature.
7. Orient North to South
When choosing a location with full sun, also evaluate the quality of the soil and the likelihood of erosion. Select a spot that sits a bit higher than the surrounding ground, if feasible.
Once chosen, plan to set your tunnel so the gable door ends open toward the north and south.

Ideally, one of the gable ends faces toward the prevailing winds for greater wind resistance in stormy weather.
If you aren’t sure which way it blows in your locale, notice how tree branches blow when a storm is approaching, or invest in a weather vane.
8. Provide Optimal Light Exposure
During the winter, providing plants with ample light for photosynthesis is crucial.
The ideal polyethylene is UV-treated, greenhouse grade, opaque, and light diffusing.
Ironically, clear plastic and direct light would seem more effective for plant growth, but diffuse light actually results in more even light distribution to all parts of the plants, and more even greenhouse heating.
Greenhouse grade 6 mil polyethylene is an opaque, light-diffusing product widely recommended and commonly used.
It comes on a gusset-folded roll so the two halves of the roll open out in opposite directions.
When properly installed, the average UV-treated greenhouse-grade plastic has a lifespan of at least four years.
Use a light meter to determine how the brightness inside compares with the light outdoors. When the readings are only 50 to 60 percent, it’s time to change the polyethylene.
Our review of 11 of the best light meters has more information.
In addition, remember to avoid trees, shrubbery, and buildings that would cast shadows directly on a greenhouse.
9. Remove Snow Evenly
When clearing snow, use soft implements like the one below to avoid puncturing the poly plastic.
If you do damage it, there are tape products available for making repairs, but you may not find them to your satisfaction.
The Eversprout Snowbuster is a foam snow roof rake with a lightweight aluminum extension pole that lets you gently ease snow off the top and sides of your polytunnel. Choose a 12-, 18-, or 24-foot length.
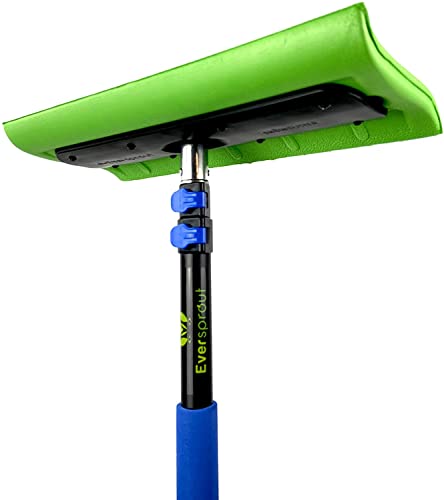
The Eversprout Snowbuster is available from the Eversprout store via Amazon.
Begin snow removal inside by gently nudging the sides and roof to dislodge the snow covering them.
Start in the middle, which is the weakest point, and work your way down to each end. Repeat on the other side.
Move outdoors and start in the center again. Gently pull the snow down toward you, working toward one gable end. Return to the middle and work to the other end. Repeat on the other side.
Don’t worry if you can’t get it all. The sun should do the rest. Work evenly and gradually to prevent the frame from collapsing.
And don’t worry about snow piled next to the greenhouse. It provides extra insulation and the pressure it exerts against the sides may help to stabilize the structure in high winds.
10. Sow Appropriate Plants
When selecting plants, choose those suited to warm- or cool-weather hoop house cultivation.

Cucumbers grow in a hoop house with open doors to admit beneficial pollinators.
Cool-season veggies for polytunnel cultivation with daytime temperatures in the 60 to 65°F range are:
Examples of warm-season crops that thrive well in polytunnels with temperatures during the day between 70 and 85°F include:
Note that some crops require insect pollination, like cucumbers, melons, and squash, and will need bees and other beneficial visitors to fruit.
Open the vents to allow them to enter once the flowers bloom.
If your winter plants are too cold, you can cover them with a thermal plant blanket for added insulation.
Similarly, if your in-ground summer flora is too hot, shade cloth helps lower the ambient ground-level temperature.
11. Work the Soil First
Before you build, prepare the soil for growing like any garden bed. Ideally, the ground will be level, not prone to erosion, and well-draining.

You can conduct a soil test to determine its suitability for growing. Add amendments as needed, like horticultural sand to improve drainage, and compost or humus to boost fertility.
Work the soil to a depth of eight to 12 inches until it is friable and debris-free.
If you skip this step and work the soil after construction, you may regret having to move equipment and debris through the gable doors at either end of your tunnel.
A Green Thumbs Up
Now you understand what a hoop house is and have 11 tips for successful installation and use.
It’s time to decide how big you want your semi-permanent greenhouse to be, where to put it, and what crops, herbs, and ornamentals to grow inside.
The typical design is a passive structure with no fans, heaters, irrigation system, or raised planters, but such features are available. Trial and error will be your best teachers as you learn how to extend the growing season in your backyard.
Hoop house gardening: I give it a big green thumbs up and know you will, too! Let us know your experiences in the comments section below!
If you found this article helpful and want more tips for protecting plants outdoors and extending the season, we recommend the following: