Adding the warmth and character of landscape lighting to your home’s exterior
is not as hard ad you think! I promise it’s not a difficult DIY project.
It is incredibly easy to install your own landscaping lights. There is zero work
with electricity other than plugging it in. You only have to do
One of my favorite pastimes (especially in the summer) is driving
through pretty neighborhoods at dusk and looking at the houses. I think
homes look prettiest at this time of day.
There’s always one beautiful detail of expensive houses that I notice —
they all have landscape lighting that makes the exteriors glow at night. It
makes everything look even more lovely and expensive.
So years ago I figured out how to do it on my own and it’s so easy
to do!
You must have an outside electrical outlet near where you want to install
the lights. Keep in mind you will have a wire, so it can’t go over a
sidewalk or driveway. You can hide the wire along the house and in this
tutorial I use them in mulch.
There are only three things you’ll need to install the lights – the
lights themselves, a power pack and wire.
This tutorial includes photos from both our old and current house. I love
adding this lighting accent to our exterior!
1. Pick your landscape lighting.
solar lights that have come a long way, and if you pick those you can stop
here. 😉
For this tutorial you’ll want to head toward the low voltage
lights:
This post may contain affiliate links for
your convenience.
I may earn a small commission when you make a purchase through links.
Shop around!
There are SO many landscape lighting options:
-
Path lights that direct the light downward for safety along a
walkway. - Deck lights can be wired in deck stairs or railings.
-
Up/spot lights for trees and bigger bushes, or even a flag on the
house or in the yard. - Flood lights for washing the house exterior with light.
- Well lights for soft ambient lighting in garden beds.
One thing to consider — I think too many lights decreases the custom
look that these add, so don’t go overboard. You can start with a few and
then add more if you don’t feel it’s enough.
I picked out some more flood lights for this project:

This is where I will tell you this is not always a cheap project. 😬
(Keep in mind the prices in these photos are most likely higher now.)
But once you make the investment, the upkeep is minimal since these low
wattage fixtures last forever. You can usually find sets of the lights
(instead of individual) to lower the price just a bit.
Consider what you’ll be lighting up! I use flood or spot lights to
highlight something pretty, like a tree. They are also great for washing the
front of your house with light.

2. Figure out the power pack and wiring you’ll need.
This is where you determine the next step — the power pack size you’ll
need. I had three path lights that were 11 watts each. The flood lights were
20 watts each, and because I wasn’t sure how many I was going to use, I just
rounded up to all six to figure out the power pack I needed.
So…
11watts + 11watts + 11watts + 20watts + 20watts + 20watts + 20watts +
20watts + 20watts =153 watts
Therefore I went with a 200 watt power pack:

I always like to get a power pack that will hold more than I think I’ll
need, just in case I add more fixtures later.
OK, you’ve got your lights and your power pack. Now you need to figure out
the wire you’ll need. They come in different gauges that will work for lower
wattages (just a few lights) up to higher wattage (more lights).


The cost goes down with the lower power pack wattage and with the
lower wire capacity.
The GREAT thing is you can avoid figuring all this out all this math and
just buy
a landscape lighting kit has everything you’ll need in it — the light fixtures, power unit
and wire. SO convenient.
But if you want to mix up your lighting like I did (or you want more
lights), you may want to buy everything individually.
You just have to screw a few parts together to assemble the lights:

3. Figure out your landscape light layout.
The first step is figuring out where you want to place the fixtures.
Keep in mind that up or flood lights work best to highlight trees or the
side of a house:

If you have large bushes or plants like we do, I recommend placing your
lights closer to the house so they can shine up through the plants and fill
the area with light:

These flood lights used to be out in the mulch in front of the bushes. But
because the plants have grown SO much, not much light was reaching the
house.
When you’re good with the location, grab your wire. Lay it out from where it
will be plugged into the power pack to the last light in your
landscape.
I give myself a little give between lights so I can move them around a
little bit if needed.
**Don’t cut the wire until you’re completely sure of where you want
all of the fixtures.
4. Connect your fixtures to the wire.
This is the fun part. 🙂 Remember NOTHING is plugged in till
the last step. You are not dealing with live wires that can hurt you. It’s
more dangerous to plug in a lamp. 😉
Each light has a little connector. You’ll unscrew the bottom part of
it:

You see those sharp metal prongs? Those are what pierce into the wire when
you screw everything back together.
Then run the wire through that bottom part and then screw the connector back
together:

Make sure your wire lays flat in the plastic base and also be sure to screw
it together pretty tight, otherwise your light won’t connect:

This keeps moisture out as well. (Mine is about halfway screwed in here.)
Keep going down your wire and connect each light. When you get to the end
where your lights will be plugged in, you’ll get to the final step. This is
the only part that involves working with the wires.
5. Connect the wire to the power pack.
wire cutter
or scissors to cut the end of the wire that will attach to the power
pack:

And then use the cutter to split the wire in half (it has a groove down
the middle). You’ll need to separate the two wires about two inches.
Close the cutter on the wire and then twist it back and forth so it cuts
the protective wire rubber insulation:

Use the wire cutter to strip about 1/2 to 3/4 inch off the end of the two
wires. Most cutters have the wire gauges marked on them, so if you
have a 16 gauge wire, you’ll place it where the 16 is noted on the
cutter.
Pull the end of the insulation off, then twist those wires together:

Don’t twist the two wires together – twist the strands of each
one.
Grab your power pack and turn it over. Remove the screws and place the wires
into each section where the screws go in like so:

As you can see here, this power pack has spots for two sets of wire to be
plugged into it. So as long as they equal to 200 watts or less, you could
have one set of landscaping lights going one direction from your outlet, and
another set going the other direction.
This is very helpful if you only have one outlet because you can run a line
of lights on one side and then the other of the outlet box.
Keep this in mind when you pick your power unit! If you plan to use two
sets of landscape lights, you’ll want to make sure your power pack has
enough wattage.
Install the screws again, making sure to tighten them onto the exposed
wires:

You’re almost done!
I’ve forgotten to do this a few times and they hold up fine, even in the
rain. But now I always cover the cut end of the wire so there’s no worry of
the lights shorting out.
NOW you’re done! Just plug in your power pack and turn it on:

The power pack has an option to keep them on all the time, on for one to
nine hours or to turn on automatically when the sun goes down. I use the
auto setting.
After it’s plugged in, you can adjust the placement of your lights a bit.
The connectors give you a bit of room to play with.
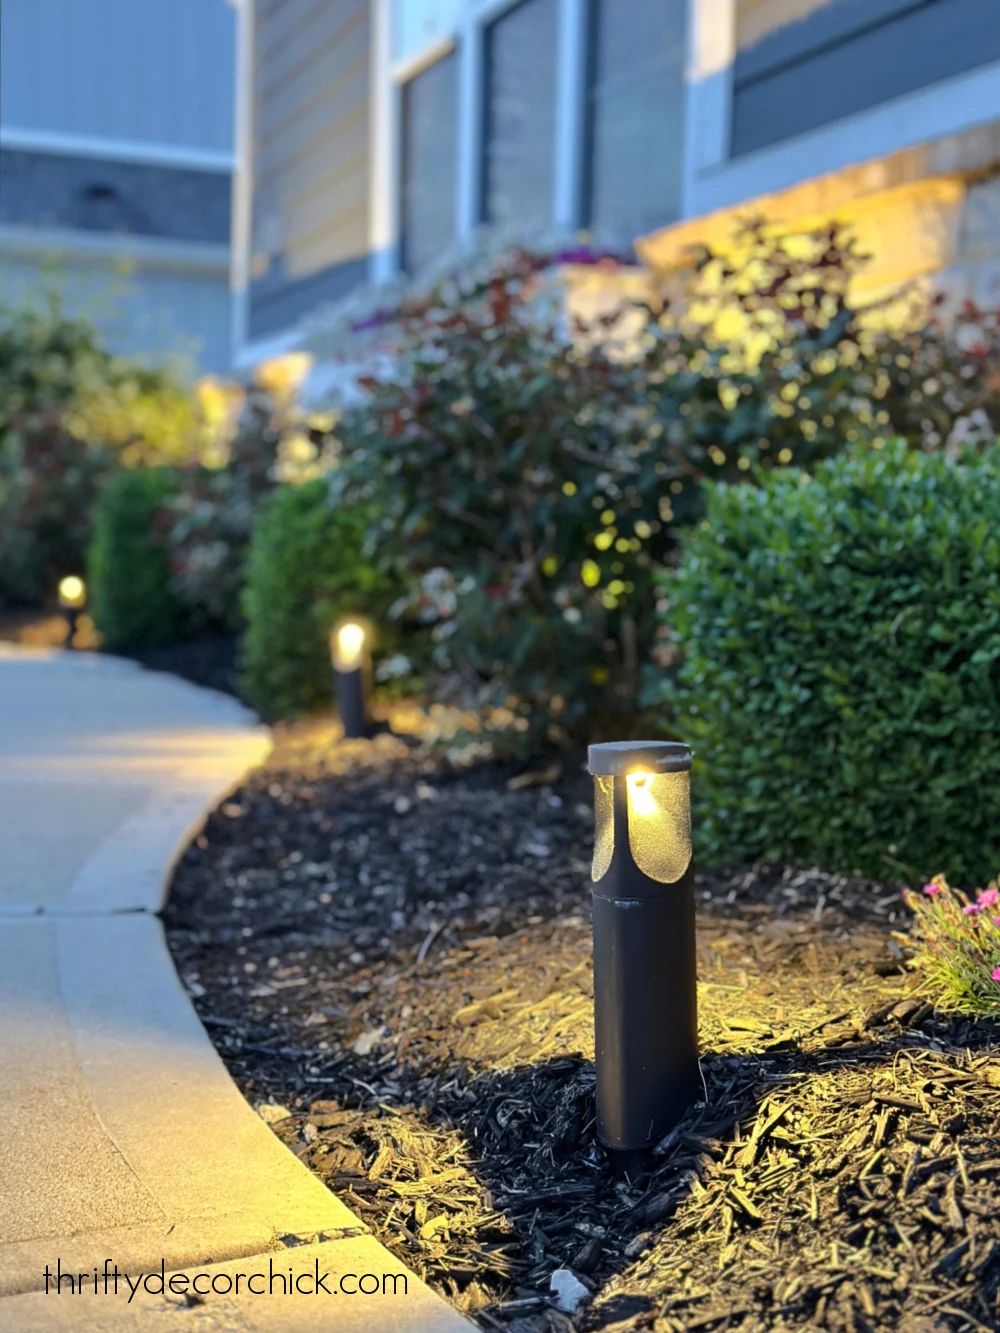
I LOVE it how these add to the look of a home’s exterior:
It looks SO good!:

I used a more modern pathway light on the sidewalk at our current
house. The down light adds some safety to our front walkway, and looks
great!:

I forgot to add that after you’re completely done, you’ll want to cover your
wire with mulch. It’s ideal to do this before you add a fresh layer of
mulch, but not necessary.
I recommend plugging in your lights at dusk so you can see how they
look. You can move them around as needed.

I hope this tutorial helps those of you who are interested in tackling this
on your own. It is really one of the easiest do-it-yourself projects. Please
don’t be intimidated by the wires!
Landscaping lights make a house look so pretty at night, and they’re nice
added security too.
Let me know if you have any questions or if I didn’t address anything you’re
wondering about.
Here’s an easy image to use if you’d like to pin this project for later.
(Hover over photo and click the button on the upper left.):


