Cheap and easy hack to frost a window for privacy.
You don’t need expensive privacy films to cover your doors or windows! This easy solution is inexpensive and gives you instant privacy.
This DIY is so simple and cheap, and helps with an annoying privacy problem that would be expensive or messy to fix otherwise. I’ve actually shared this “hack” before (a looong time ago), but it’s one that’s worth sharing again!
I’ve used this for frosting glass on glass doors and interior windows and it is a great, inexpensive solution. Plus, it’s easily removed if you ever change your mind.
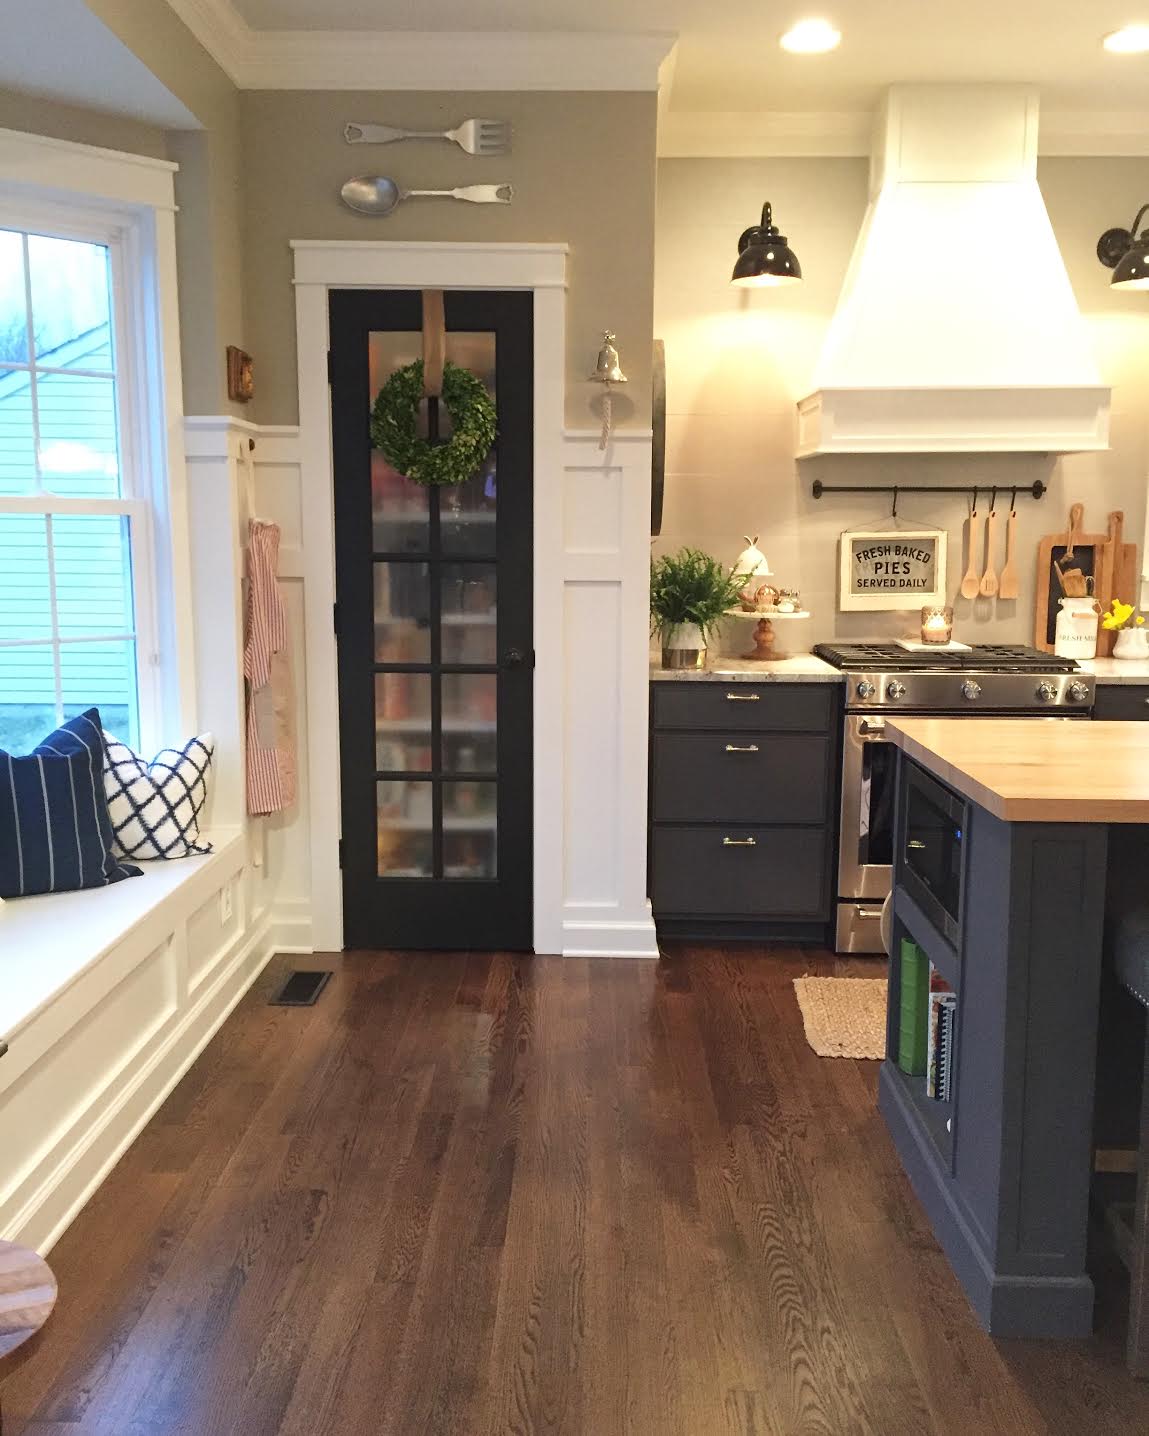
The first time I did this was on our glass pantry door ten years ago:

This post may contain affiliate links for your convenience.
Ha! Just…not the best. I’ve always felt for our guests especially. 😝
I don’t know what took me so long, but I finally did this private window trick again and it worked like a charm.
Now there are a few ways to do this, but I promise you this is the easiest. You can buy frosted window film, but those options are more costly. You can also use a frosted glass spray paint, but that’s messy — you have to worry about overspray and fumes…and it won’t hold up well over time on a window or door that gets a lot of use.
You can also use a glass etching cream to do this permanently, but I would only try that in extreme cases.
For this DIY method of frosting glass, you’ll need transparent matte Contact paper:

Nothing fancy! It will look completely clear on the paper backing, but as you can see, it’s actually not completely clear.
To do this easy DIY project, you’ll just need a spray bottle with water, scissors and some way to push out the bubbles.
Before you start, give the window a good cleaning with glass cleaner and a lint-free cloth.
Because this paper isn’t wide enough for the window, I cut the pieces in the size of the window panes. You can also cut them in strips, which is how I did it on the window in our old bathroom.
The helpful grid on the paper makes it easy to cut straight lines. You really don’t have to be exact with it, especially for a window.
Douse the window with plenty of water, then spread the contact paper over the surface of the glass. The water is a must — it makes it easy to maneuver so you can get it just how you want it.
This time, the vinyl looked like this a day or so after I installed it:

But those marks will disappear over a few days. They almost look like bubbles, but aren’t. So don’t freak out if it doesn’t look perfect immediately.
UPDATE: This is how the window looks years later…the contact paper is still in perfect condition:

I only placed it on the bottom part of the window. You will not be able to see through it — everything will be blurry. When I did this last time I thought it would bother us not being able to see out, but it never did.
You can’t control the opacity of the window like you can with other DIY options, but I have never found it necessary to do more anyway.
Here’s a look at the finished window from the outside:

As you can see, we can still see clearly out of the top of the window.
Also, if you stand right up on it like I am above (I’m leaning against the window) I’m blurred but not overly so. But if you’re just inches away you can’t see through nearly as well.
At night with a light on you’ll see movement but not specific…parts. 🙂
I took a pic of our son standing away from the window slightly and couldn’t see him at all. I thought he had moved away before I could take the photo:

I also love that you really can’t tell half of the window is covered from the outside. I’m considering doing this on some other bathroom windows as well.
Here’s how it looks from the inside:

You can really see the effect here with the green trees above and below.
This contact paper method is also easily cleaned because you don’t have to baby it. I spray the contact paper with glass cleaner and wipe like the rest of the windows.
There are so many places this easy window film would be useful!
- If you have sidelights by your front door or windows in your door and want privacy, this is easier and than curtains by the door.
- You can use this film along the bottom half of bedroom or living room windows to allow light in but add some privacy.
- It’s a GREAT option for renters. Just peel it off when you’re done.
- This could even be used on glass shower doors, just be sure to place it on the outside of the doors.
I can whip this quick project out in ten minutes and a whole roll is just a few bucks — one roll will cover a whole door or multiple windows easily. Have you ever tried this easy private frosted window trick?
P.S. You can see the powder room refresh I did a couple of years ago here:


