The tile project I’m sharing today is one of my favorites I’ve ever done —
first of all because it was SO easy, thanks to this awesome product, and
because it is beautiful!
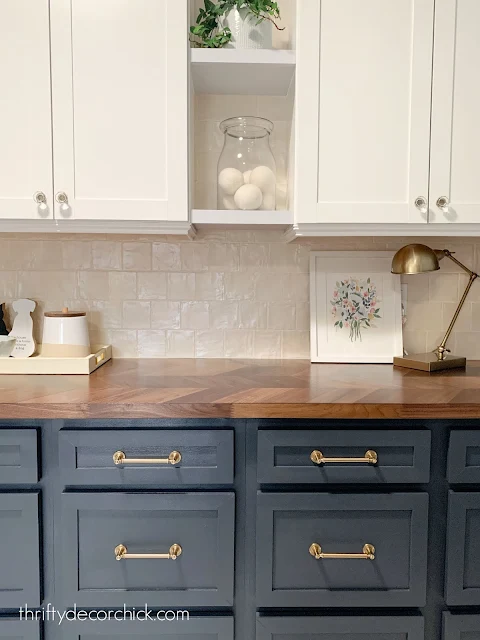
It has a wavy texture that makes it look handmade…and usually it is! The
real stuff is VERY expensive, but I really wanted to use it for the small
backsplash in our laundry/mud room:
This post may contain affiliate links for
your convenience.
I may earn a small commission when you make a purchase through links.
You can install in a straight stacked look like this for a more modern look,
or in a brick pattern for a more traditional look.
The thing is, authentic Zellige tile is handmade from clay and has an
imperfect look that I don’t always love. Also, it’s usually installed very
close with small grout lines (which adds to the imperfect look).
I’ve always preferred the more uniform versions I’ve seen, with a bit
of contrast with the grout.
this ceramic version
pictured above that still has the handmade look, but is very affordable!
Plus each tile is uniform and the same size, but still has the pretty
details that I loved about the real stuff.
It went into my cart! I was even more pleased in person — they were so
lovely!
I had a couple hiccups in this tile process along the way because I didn’t
order enough at first. I had to wait on backorders and then the second
shipment was
much shinier than the first. I was able to pick and choose out of the
boxes to find some that matched better.
You’ll probably be able to avoid this by buying all you need at once so
they are from the same lot number.
But overall the install process was a breeze! I used a non-mortar install
product that makes the tile installation SUPER quick and mess-free.
Before you start tiling, figure out the middle of the area you’ll be working
on. Since ours was the backsplash, I marked the middle and centered a tile
on that:

I then lined up the tiles each direction to make sure I wasn’t going to have
any tiny slivers at the ends.
so quickly. It’s a
tile setting mat
that you use instead of mortar:

Funny thing is, I got these adhesive mats as a gift YEARS ago…I’m talking
probably ten years back. I didn’t have any need for them then, and tucked
them away in the garage where they sat. I forgot about them till we
moved.
I wasn’t sure if they’d even still work, but I kept the mats hoping to try
them one day.
Thankfully they worked SO well and were crazy easy to use! They have a
sticky back that you attach to the wall, and a strong adhesive that grips
the tiles on the front.
Simply stick the mat on the wall, and when you’re ready, peel the paper off
the sticky front:

I used one and a half packages for the whole project. I’m
really impressed with this product.
I love that this mat makes it easier to work in sections. You can stick the
mat to the wall and walk away from the project at any point.
Your tile should include details that will help you determine what size tile
spacers and grout joint size you’ll need to use. This one suggested 1/16″
grout lines. I thought about not using spacers at all, but decided in the
end to use the them for a more uniform look.
My countertop was level, but I made sure to check the tile as I was going to
make sure it was level as well:

I wanted a more traditional look, so I did a brick pattern — this is also
a bit more forgiving in my opinion.
You have to be pretty meticulous so the lines match up perfectly with a
straight stack tile layout:

If you have outlets or switches to work around, you’ll need to turn the power
off at the breaker and take your outlet cover off to work around them:

Hold your tile mat up and trace where you’ll need to cut before sticking it
on the wall. You can use a utility knife or scissors to cut the mats.
The mat is VERY sticky, but you can remove tile and rearrange it
at first if needed. I’m not sure how that would work after it’s been
stuck for awhile.
small (and it was COLD in the garage the day I was installing), I went with
a tile cutter
instead.
It is SO easy to use! You just line up your tile where the cut needs to
be:

Then you roll the diamond blade along the tile with some pressure to score
it. Make sure your pressure is consistent from start to finish.
Just push down and it snaps the tile in a clean line:

It works so well and super fast. You can use these for larger tiles too —
just make sure the cutter you get will work for your tile.
The only issue I had was cutting smaller slivers of tile. I found that if I
scored it with the same pressure from the bottom to top, I could get pretty
small cuts.
Always order about 10 percent more tile than you’ll need!
My issue with not using the wet saw was cutting around outlets. With a tile
saw you can tilt the tile toward the blade for complex cuts. There are other
ways to do it too — I was about to run out and buy a diamond blade for my
Dremel tool when I noticed something as I was cutting with the tile
cutter…
I realized the two pieces can be matched up perfectly after being cut. I got
an idea — I measured where I needed to cut for the outlet, then used the
tile cutter to make those.

It worked! I wasn’t sure it would hold and was pleasantly surprised.
It even worked when I had to cut the tile into three parts to work around an
outlet:

I did baby them a bit as I installed — making sure not to push to hard. But
they look great and you would never be able to tell that I cut them apart!
That may help you as well if you don’t have access to a wet saw.
Another great thing about using the tile setting mats is you can grout
immediately, unlike mortar. I used this premixed, sanded grout to finish up
this tile backsplash:

Make sure to protect your surfaces before starting!
pre-taped plastic sheets
for projects like this — you stick the painter’s tape on and then pull the
plastic out. It sticks to any surface easily:

Mortar and grout aren’t the most fun to install on a vertical surface —
you’ll lose a lot to the floor or counter.
I didn’t have a grout float (mine was a mess and I had tossed it months ago)
so I just used a plastic putty knife — and I think it was even easier to
use:

after, use a
large damp sponge
and a bucket of water and start wiping excess grout off the tile.
If there are any spots you missed, you can usually move the it around and
fill in with the grout sponge.
You’ll need to use clean water and wipe a few more times with the sponge to
get any grout haze off of the tile. Grout will lighten as it dries, so don’t
freak out if it doesn’t look right at first!
If you are tiling a floor or a backsplash where that will get wear and
tear, you’ll want to use a grout sealer afterwards so it doesn’t stain.
Not too bad right? The install went pretty quickly!
To finish up that part of the wall, I made some quick “floating” shelves to
hang between the cabinets:

I used scrap luan and wood and then nailed them in from inside the cabinets.
A little piece of trim across the front finished them off:

This tile is SO pretty!! It comes in cream, white, blue, gray and black. All
are beautiful.
I went with cream for many reasons, but mostly because our upper cabinets
are not pure white. I worried the white tile would look off against
them.

By the way, if you have an outlet in an odd spot — take your tile down
the wall! It flows so much better than ending it awkwardly on the wall
around an outlet.
I LOVE this room!:

Here’s where I started with this area:


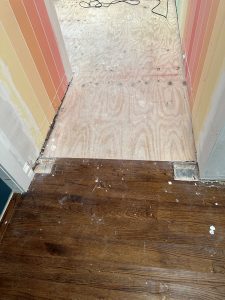


