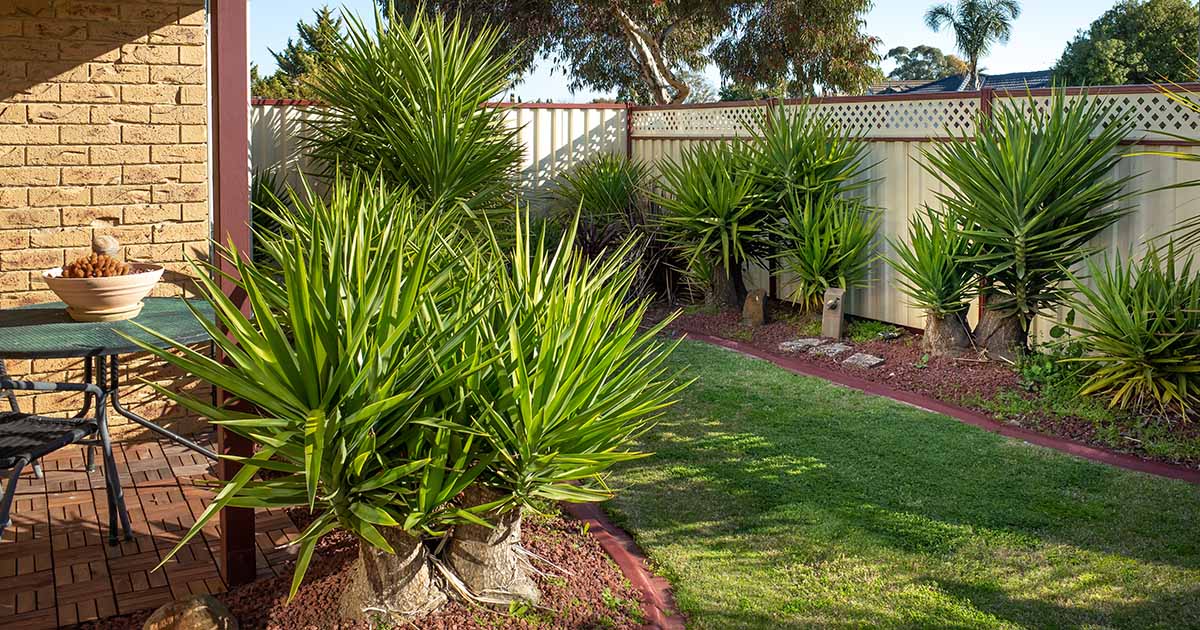
Yucca is a genus of popular ornamental perennials, grown indoors and out for their impressive, statuesque forms, handsome foliage, and exuberant flower spikes.
And you can quickly increase your stock and save some money via several easy propagation methods!
Along with their good looks, yuccas are loved for their tough, resilient nature. These plants have excellent drought tolerance, are resistant to both cold and hot temperatures, and require little maintenance.

We link to vendors to help you find relevant products. If you buy from one of our links, we may earn a commission.
The two garden forms are the shrub yuccas, which are low-growing with strappy, sword-like leaves radiating out from a basal rosette, and tree types, that feature single or multiple stems with tufts of sharp foliage at the tips of the branches.
Both types are low maintenance plants that require little help from the gardener to thrive. And many varieties of both the bush and tree forms are clumping, producing offsets or baby plants around the base.
You can learn more about yuccas and how to grow them in our guide.
Dividing offsets is the easiest and fastest way to propagate yuccas, but these handsome plants can also be started from seed, via stem cuttings, and root cuttings as well.
So are you ready to multiply your stock of these impressive succulents? Then let’s explore the five easy ways to propagate yuccas.
Here’s a quick look at what I’ll cover:
How to Propagate Yucca Plants
Offset Divisions
Many of the popular yucca varieties like Adam’s needle (Y. filamentosa), beaked (Y. rostrata), and spineless (Y. elephantipes) types produce offsets or pups around the base, which eventually form into robust clumps.

Dividing these offsets is the fastest and easiest way to create more yuccas.
If you like quick, simple ways to propagate (and who doesn’t?!), you can encourage your parent yucca plants to produce more offsets by removing the flower stems after the blooms are spent.
By not allowing the yuccas to set seed, they’ll respond by producing offsets.
Young pups are the easiest to work with because the sharp, spiny foliage is still small enough to handle easily. But be sure to wear long sleeves and gloves – the pointed tips and leaf edges can be razor sharp.
With young offsets, the roots haven’t become overly dense or hard, which makes them easier to cut and lift.
But for offsets to thrive after transplanting, wait until the pup’s stem sections are at least four inches long before removing them.
Our guide to propagating yucca offsets has step by step details, but in a nutshell, the pup is separated from the parent with a clean, sharp spade inserted between the two, severing the root that connects them.
However, if you’re removing new shoots from a large trunk, such as Y. elephantipes, your chances of removing a root section are pretty slim.
Instead, you’ll need to use an adz, wide chisel, or sharp knife like a hori hori to remove a section of the trunk the offset is attached to.

Cut a shallow section of the bark and some of the fiber below, about one inch wider than the attached offset, removing it cleanly from the parent.
You don’t have to cut deeply – the top layer of wood below the bark is where the new roots emerge from.
Although yuccas are monocots, grasslike flowering plants, and don’t develop woody trunks like a tree, they do have a monocot cambium layer that supports secondary growth. A shallow slice does nicely for rooting.
Sprinkle the cut sections of new shoots with a powdered rooting hormone if desired.
Bonide Bontone Rooting Hormone
You can find powdered rooting hormone available from Arbico Organics.
After being removed from the parent, offsets and new shoots can be potted up for container growth or transplanted directly into garden beds.
In temperate regions, spring is the best time to divide and replant offsets because it gives them a full growing season to establish roots and get settled in before winter.
But if you have very hot summers and mild winters, fall is the better option – it’s easier for them to root in mild fall temperatures than in searing summer heat.
Offsets can be taken from both garden and indoor yuccas.
Sowing Seeds
Sowing seeds is also possible, but it can take yuccas started from seed up to five years to flower!
Germination results can also vary depending on the seed quality and viability – these seeds can be stored for up to five years in the right conditions. Note that only seeds collected from species plants will reproduce true to the parent.

Seeds can be started indoors at any time of the year and sown outdoors in spring when overnight temperatures remain above 50°F.
Germination will be better if you wait until the overnight temperatures are 60°F or warmer.
First inspect your seed stock, discarding any that are broken or damaged, then soak the remaining seed in room temperature water overnight.
Discard any seeds that float as they’re not likely to germinate.
Start outdoor yuccas by sowing seeds in four-inch pots filled with a commercial succulent potting mix, or you can make your own from our three-ingredient succulent soil recipe.
If you want a recommendation for a commercial potting mix, I use Tank’s-Pro Cactus and Succulent Mix, which you can find available at Arbico Organics.
Tank’s-Pro Cactus and Succulent Mix
Sow each seed half an inch deep and water lightly, keeping the growing medium barely moist until the seeds sprout in three to four weeks.
Leave the seedlings in small containers for their first growing season, watering weekly to help them become established with strong roots.
Provide seedlings with frost protection by moving them into a sheltered, frost-free location for winter.
To sow indoors, choose a warm location with temperatures between 60 and 75°F – a bottom heating mat is an easy way to help to maintain the optimal temperatures.
Add a moist seed-starting mix suitable for succulents or cacti to four-inch pots. Sow seeds half an inch deep and water lightly.
Place the pots in a bright windowsill or under grow lights, keeping the soil lightly moist but not wet until the seeds germinate.
Water weekly during their first growing season.
Leave them for a year in their starter pots before transplanting out to the garden or into larger containers.
Stem Cuttings
Stem cuttings are another reliable propagation method, and this is best done in spring or summer.

Choose healthy stems with vibrant foliage at the tips and take cuttings six to 10 inches long.
Strip away the bottom leaves, leaving foliage at the tip only. Allow the cut end to dry for a day or two so that the cut starts to callus over. Set it on a plate in a dry location out of direct sun.
Fill a six- to eight-inch pot with a succulent potting mix and water lightly so the soil is just moist but not wet.
Sink the cut end of the stem halfway into the potting mix and gently firm the soil around it to hold it in place.
Place the container in a sheltered spot with bright, indirect light and keep the soil lightly moist until roots form, which should take about four weeks.
Move the pots into a spot with morning sun and afternoon shade until fall, allowing them to develop a strong root system and watering only when the top inch of soil dries out.
In fall or the next spring, plant out into the garden or large containers.
Bare Stems in Water
For varieties that sport long, leafless stems, cuttings can also be taken from the bare sections as well as the foliated tip – this is a great way to reuse leftover stems after pruning or resizing mature yucca plants.

Take cuttings in spring, choosing a healthy stem free from blemishes, and use a clean, sharp knife to sever it from the parent yucca at the desired height.
Cut the stem into four- to eight-inch sections, making a mark at the top end to differentiate it from the base.
Set the base end of each piece in a jar half filled with room temperature water and place them in bright but indirect light. Top up the jars every few days with fresh water.
After a couple of weeks, you should see white nodules forming around the base area where the roots are developing.
A few weeks after the roots emerge, buds start to swell and push through the bark at the top end.
When the roots are four to six inches long, pot up each stem into individual six-inch containers filled with succulent potting soil.
Place the pots in a sheltered location that receives morning sun and afternoon shade. Water when the top inch of soil is dry.
In late summer to early fall, transplant out into beds or larger containers.
Topping
Propagating the tops of pruned stems is another reliable method to create more plants, and makes use of the remains after cutting back your yucca in a hard prune.
In early spring, cut back overgrown stems to a desired height using clean, sharp shears.

Use the stem sections for rooting in water as outlined above and pot up the leafy stem tops – just follow the instructions in the stem cuttings section above to prepare and pot the tops.
However, if you have large, thick stems from a mature yucca, you may need to use a larger pot of up to 12 inches to accommodate them.
After they have rooted and spent the summer in their starter pots, toppings can be transplanted in fall into garden beds or containers.
Root Cuttings
Over time, yuccas can develop massive root structures, forming long, tuberous taproots that can also be used for cuttings.

Root cuttings can be taken in late winter or early spring and only mature yuccas should be used for this process as harvesting roots from young specimens can significantly slow down their growth.
Dig down eight to 12 inches and remove a three-inch piece from existing healthy roots.
Allow the root section to rest and dry out for a couple of days in a cool, dry location before planting.
Plant each section in a 12-inch pot filled with succulent potting soil that has had one part of grit added to it, such as landscape sand, crusher dust, or stone chips.
Root cuttings absolutely must be planted in well-draining soil to avoid issues like rot.
Water lightly and place the cutting in a sheltered spot that receives bright, indirect light. Keep the soil lightly moist but not wet.
Roots generally form in about three to four weeks and new growth should emerge aboveground in another four to eight weeks, but it can take longer.
When new growth is about four inches in length, move the pots into a location with morning sun and afternoon shade. Transplant out the following spring.
Planting Out
Yuccas can be transplanted out to the garden or into permanent containers in spring or fall. It’s best to do this in fall if your area experiences extreme summer heat.

Offsets with a large, healthy section of root attached can be planted directly into the ground in spring. But if they’re on the small side, pot them up into six- or eight-inch containers then transplant out the following spring.
Give them a full sun location in well-draining soil of average fertility, a lightly acidic pH of 5.5 to 6.5, and a coarse, gritty, or sandy texture.
Cuttings taken in spring to early summer can be planted out in fall but it’s best to wait until spring to transplant those taken in mid to late summer – young root systems can still be susceptible to damage in severe winter weather.
Those started from seed are best left in small pots for their first two years to give them a chance to establish strong roots, and they should also be sheltered from freezing temperatures in winter.
Plant them out once the roots have started to circle the inner pot and the plants are becoming rootbound.
If you’re planting out in spring, wait until overnight temperatures are reliably above 50°F.
Loosen the soil to a depth of 12 to 18 inches and twice as wide as the root ball. Dig deeper for larger plants.
Work in one part of compost, well-rotted manure, or worm castings to enrich the soil. While yuccas thrive in lean soils, adding a moderate amount of organic matter helps new yucca plants to become established easily and quickly.
Mix in one to two parts of grit for sharp drainage, using materials like landscape sand, pea gravel, or stone chips. Excellent drainage is crucial for a yucca’s wellbeing as they tend to develop root rot in wet soil or standing water.
Create a planting hole the size of the root ball and mix in one or two tablespoons of bone meal to promote strong roots.
Set the roots in place with the crown just below the soil line. Backfill with soil and firm in place.
Water gently but deeply, providing new transplants with one inch of water every 10 to 14 days, in the absence of rain, for their first growing season. After that, water when the top two or three inches of soil dries out.
To transplant into containers for indoor and outdoor growth, read our guide to growing yuccas in containers for step by step instructions.
More Water-Wise Plants
With their striking shapes, bold flowers, and drought-tolerant nature, yuccas are an excellent choice for arid settings, mixed succulent beds, xeriscape gardens, and houseplants too!

To easily create more of these low maintenance plants, offset divisions are the fastest and most reliable propagation method.
But stem and root cuttings, plus the foliated tops from a hard prune, also produce good results.
And if you’re feeling adventurous, you can even try your hand at sowing seeds – but you’ll need plenty of patience for this method as it can take several years for seed-started plants to develop flowers.
Whichever method you try, you’ll love having more of these outstanding waterwise plants in the garden!
What about you folks, what’s your go-to method for propagating yuccas? Let us know in the comments sections below.
And for more yucca know-how, be sure to add these guides to your reading list next:


