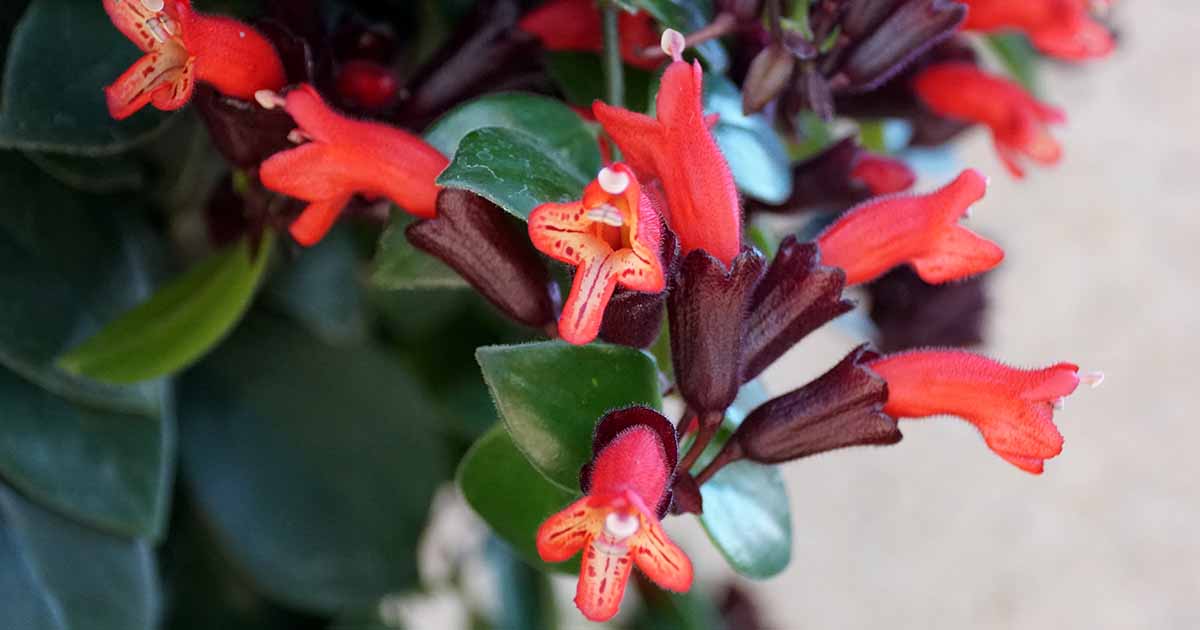
With vibrantly colored, tubular flowers and lush cascades of glossy green foliage, lipstick vines (Aeschynanthus spp.) are easily cultivated tropical beauties that brighten any indoor setting.
Along with bright, indirect light and consistently moist but well-draining soil, regular grooming and pruning sessions help them to look their best.

We link to vendors to help you find relevant products. If you buy from one of our links, we may earn a commission.
In general, these are low-maintenance plants but in some environmental conditions they can become thin and leggy, or overgrown and tangled.
A little hands-on attention with a good pair of snips can quickly restore your plants to their elegant, draping silhouette.
A light pruning also encourages new growth, producing verdant stems dense with opulent leaves and plenty of bright, bold flowers!
And with the right care, your lipstick plant will reward you with an almost constant display of bright blooms and a trailing habit that looks stunning tumbling from hanging baskets, plant stands, shelves, or fanned on a trellis.
Are you and your snips good and sharp? Then let’s cut to the chase on how to prune and groom lipstick vines.
Here’s what you’ll find ahead:
Pruning and Grooming Lipstick Vines
Deadheading Spent Flowers
Lipstick vines are loved for their waxy green foliage and tubular flowers in shades of crimson, magenta, mauve, flame orange, pink, and yellow.

They flower year-round in ideal lighting, but the heaviest displays are typically in spring and summer.
These tropical perennials are considered easy to care for, and you can learn more about how to cultivate them in our guide to growing lipstick vines.
Deadheading spent flowers isn’t mandatory for plant health or vigor, but it does help to maintain a well-groomed appearance.
To keep your plants looking their best, remove flowers as soon as they fade.
Use clean, sharp snips or scissors to cut the peduncle – the flower’s stalk – close to a set of leaf buds on the stem.
For delicate tasks like grooming houseplants, I like to use snips that are easy to handle with strong, sharp blades.
These Fiskars Softouch Micro-Tip Pruning Snips are a good choice for precise work.
Fiskars Softouch Micro-Tip Pruning Snips
You can find them available via Amazon.
Spring Revival
Along with their glamorous flowers, lipstick vines have highly attractive foliage in shades of kiwi, moss, and forest greens that can be variegated or speckled as well.

The thick elliptic or ovate leaves have a waxy finish providing a handsome sheen, and like all houseplants, they need an occasional cleaning.
An accumulation of dust and household particles on the leaf surfaces can inhibit the process of photosynthesis causing stunted growth or lack of flowering.
If you can dust and wipe the leaves with every change of season, your vines will love it.
But if you’re not that ambitious about cleaning houseplants (like me!), a maintenance session in early spring can help to revive plants and restore their sparkle.
Use a cloth moistened with clean water and wrung out to gently wipe down the leaf surfaces, cleaning both top and bottom surface areas.
I find that the soft nap of a microfiber cleaning cloth does a good job on houseplant foliage, and they wash up nicely after use.
You can find microfiber cleaning cloths from Amazon Basics via Amazon.
At the same time, remove any dead leaves or damaged stems and check for potential pest problems, like spider mites.
After your plants are clean and shiny, it is a good time to stake or trellis your vines if you’d like to promote upright growth.
Trellising and Staking
Lipstick vines grow 12 to 24 inches tall and trail or spread 12 to 48 inches, which makes them attractive as hanging plants.

But they can also be trained for upright or climbing growth by using houseplant stakes or a small trellis – another great way to showcase their showy leaves and flowers!
Training the vines is easy. Just provide them with appropriately sized support, then gently lift the stems and hang them in place.
You may need to use small orchid clips or plant velcro to help secure the stems in place because Aeschynanthus aren’t climbers, they’re danglers.
They don’t twine, twist, or use suction pads to reach skywards – in their native environment, these epiphytic species droop down gracefully from host trees or cracks in rock faces.
Training them onto supports also helps to keep the air circulating freely through the foliage and keeps the stems tidy, preventing them from overlapping or getting tangled.
For vining houseplants, I like to use “twig” plant stakes – their height is adjustable and the little branches are ideal for looping stems over, plus they discreetly blend into the background.
You can pick up a six-pack of adjustable Twig Plant Sticks, complete with orchid clips and plant ties, at Amazon.
Pruning for Shape and Size
In general, lipstick vines don’t require a lot of pruning – a spring cleanup is usually all that’s needed to restore an attractive appearance.

Healthy plants regularly develop new vines at the base, filling out and spreading into a pleasing pattern without any help.
But over time, the older stems can become sparse and bare, producing few flowers.
Or they can go the other way, and become tangled into shaggy, overgrown drapes with irregular flower production.

A light pruning every few years is an easy way to restore appearances and promote dense, full plants.
It also helps to improve the flower count, and by varying the length of the stems, flowers are distributed throughout the plant, not just at the lower extremities.
Flower buds develop at the tips of new stems, so be careful not to prune in spring or you’ll reduce the number of blooms the plant will produce.
The best time to prune is after the plant stops flowering, usually from late summer to early fall.
And don’t wait for winter to prune them either – snipping the vines while they’re still in an active growth phase helps to stimulate new growth. And new growth means more flowers!
Before you start cutting, decide on the overall profile you want, then choose the stems to work with.
Be sure to limit your pruning to remove no more than one third of the length of the stems at one time to avoid shock. If you want to cut them back further, give your plant a couple of months to recover before pruning again.
Start by removing dead or damaged stems and leaves that are dry or yellowing. Always use clean, sharp snips or scissors for this and avoid tugging at dead material which can easily dislodge the shallow roots.
Begin pruning by cutting back stems with a light touch, then after making the first cuts, step back to check the shape of your work.
Decide which stems, if any, need more reduction and re-trim until you achieve the desired look.
Make your cuts just below a leaf bud or node to encourage branching and promote a full, bushy appearance.
As a little side note, if your vines are hanging down, the cut will be just below a leaf or leaf node. But if your vine is growing upright, the cut would be above the leaf or node.
Whichever direction the stem is pointing, you want to retain the leaf or leaf node closest to the cut end because this is where lateral branching emerges from!
If your plants don’t need pruning but you’d like a fuller shape, pinch or trim out the tips of selected stems to encourage lateral branching.
Use your snips to trim the stem a few inches from the tip, cutting just below a leaf or leaf node.
Propagate the Cuttings
Lipstick vines are best propagated by stem cuttings, so if you’d like more plants, use the cut stems from your pruning session for propagation!

Take four-inch sections from the tips of a healthy stem and remove the lower leaves.
Rooting stem cuttings in soil is a reliable propagation method, but isn’t always 100 percent successful, so take a couple of extra cuttings in case some fail to root.
Dip the stripped ends into a rooting hormone powder if desired.
Insert the stripped end into small pots three-quarters full of moistened starter soil, firming the soil gently around the stems to keep them in place. Three or four cuttings are suitable for each four- to six-inch pot.
To root stem cuttings, I like to use a potting mix that provides good soil aeration. Tank’s-Pro Lite Seeding and Potting Mix has coconut coir and perlite for lofty soil that doesn’t compact.
Tank’s-Pro Lite Seeding and Potting Mix
You can find Tank’s-Pro Lite available at Arbico Organics.
Place the pots in a location that receives bright, indirect light and temperatures between 60 and 70°F.
Keep the soil lightly moist and roots will form in four to eight weeks.
Remove any stems that failed to root and transplant the healthy ones into individual pots when they’re 12 weeks old.
Showy Tropicals
Lipstick vines are prized for their attractive foliage, graceful vines, and bright, tubular flowers – showy and easily cultivated tropicals that effortlessly brighten our homes.

And to keep your plants looking their best, deadhead spent blooms regularly and give the foliage a spring cleaning to revive appearances.
To keep the stems in check, train them over stakes or a trellis for a unique, upright look or give them a light pruning after flowering to manage overgrown, shaggy vines, and to promote more flowers.
And don’t forget, it’s fast and easy to start new plants from the trimmed vines!
Any questions about how to groom or prune your lipstick vines? Drop us a line in the comments section below.
And for more flowering houseplant know-how, add these guides to your reading list next:


