After spending hours working on cabinet doors and drawer fronts yesterday (getting them caulked, primed, sanded, and ready for paint today), I decided to take a little bit of time to put together the last section of cabinets and get them into place. And while I was putting the middle section of cabinets together, I realized that I had made a mistake in ordering the cabinets. Let me show you.
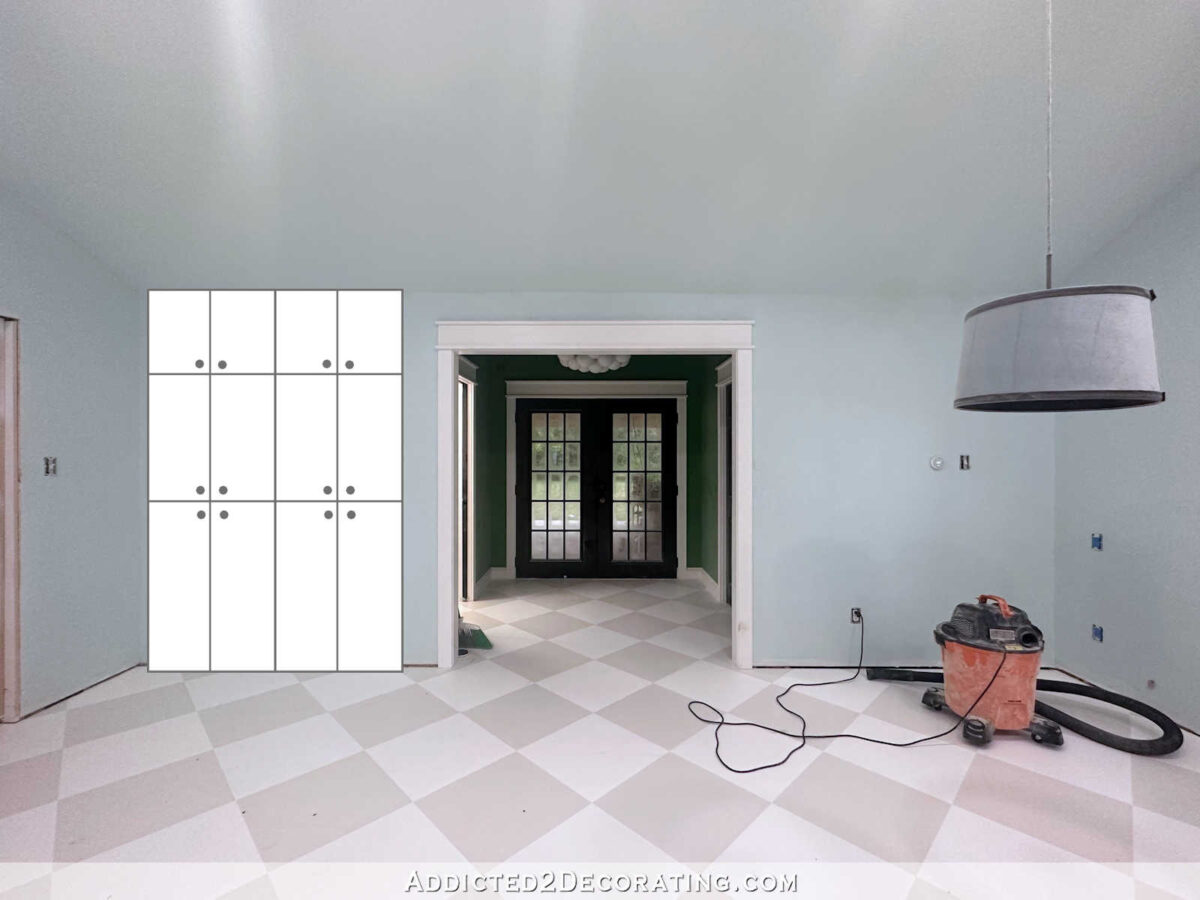
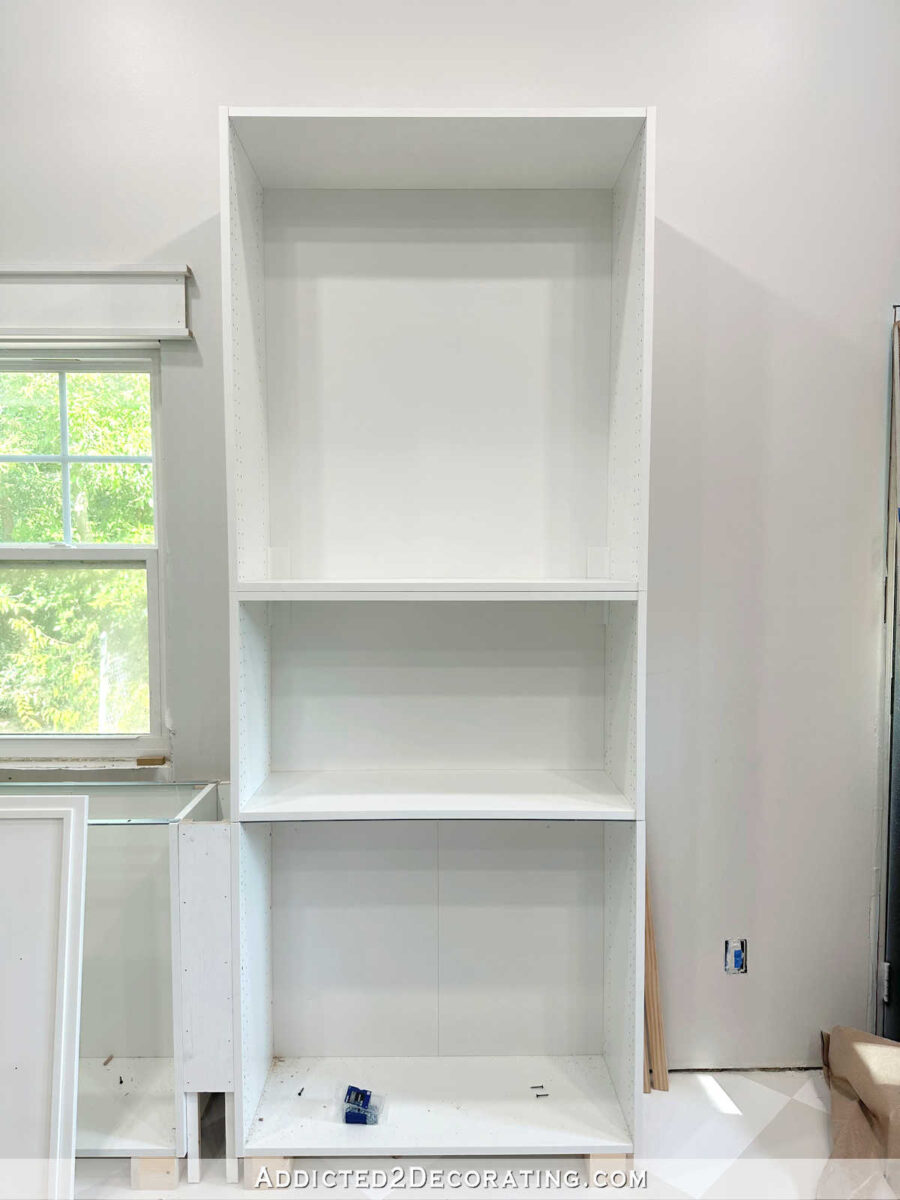
The last section of cabinets I needed to put together was this area just inside the studio door from the breakfast room.
For this area, I ordered two cabinets that are 40 inches tall for the bottom, two cabinets that are 30 inches tall for the middle, and two cabinets that are 20 inches tall for the top. That gives me a total of 90 inches in height, so after adding the feet and the crown molding, I’ll be right at the 96-inch wall height.
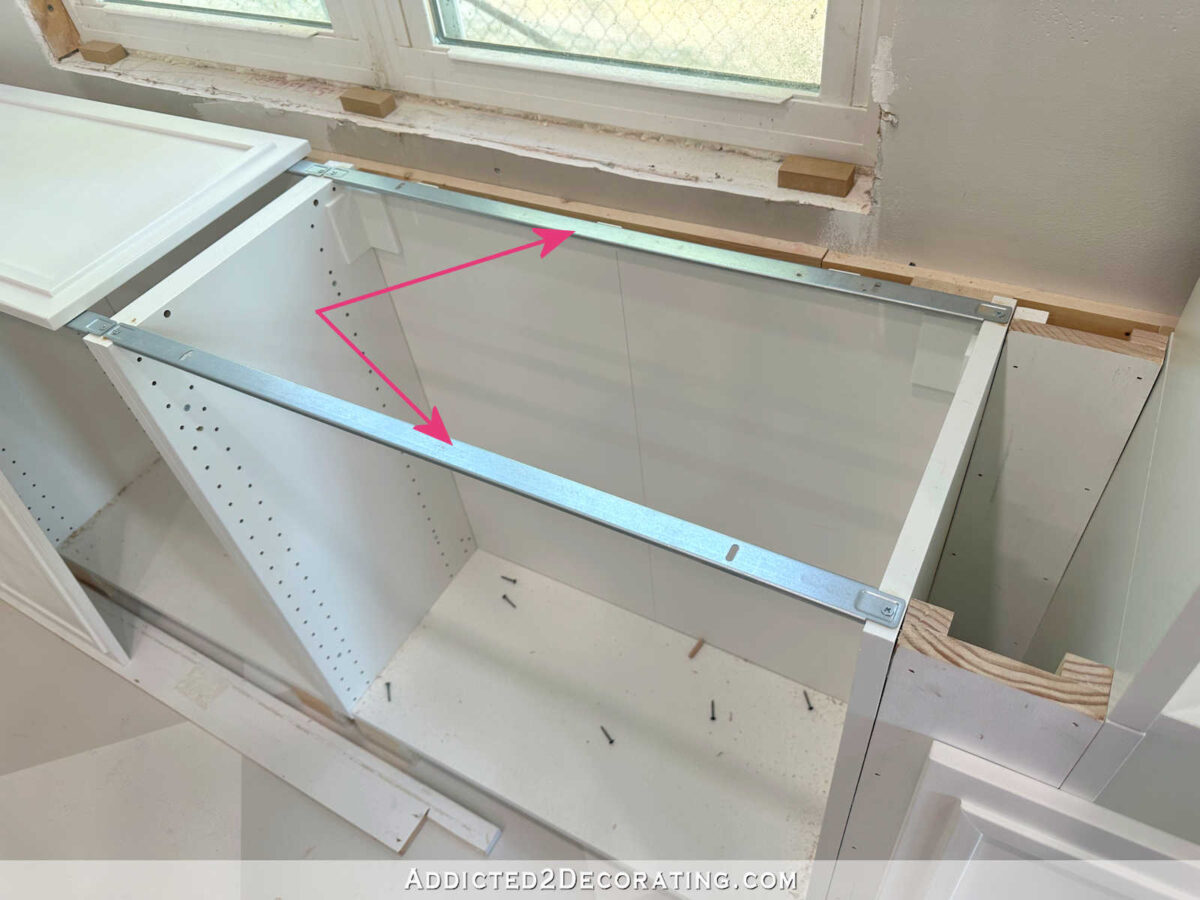
But here’s where I ran into a problem. When ordering, I didn’t pay attention to which 30-inch-high cabinets I was buying. I was just hyper focused on the dimensions (30h x 30w x 15d) , and didn’t pay attention to much else. And it just so happens that 30 inches is the standard height for all of their lower cabinet frames. Because I wasn’t paying close attention when I ordered, I ended up buying two 30″ x 30″ x 15″ lower cabinets instead of upper wall cabinets. The lower and upper cabinets are almost identical with two exceptions.
First, the lower cabinets have holes drilled on the bottom panel of the cabinet box so that their cabinet legs (which are sold separately) can be attached. And second, the lower cabinets don’t come with a solid top panel for the cabinet box. Instead, they come with these metal rails that have screw holes in them so that you can screw the rails to the countertop.
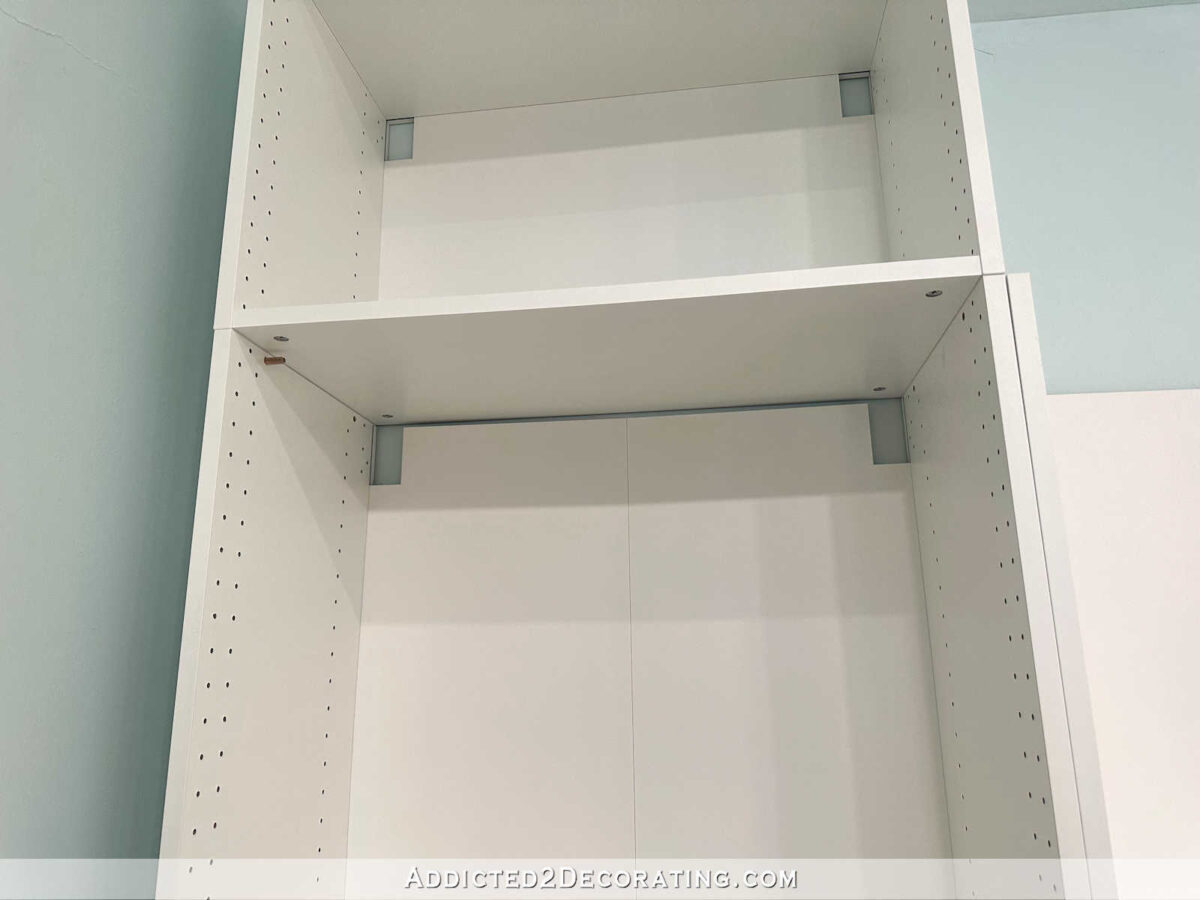
The upper wall cabinets have solid panels on the top and the bottom, and no metal rails. You can see the difference on this bank of cabinets in my office area of the studio.
You can see the lower cabinet rail attached to the bottom panel on the middle cabinet, but then the middle and upper cabinets have solid panels that can be attached to each other with screws.
It doesn’t bother me on those cabinets at all. That wasn’t the result of a mistake in ordering. It was the result of me changing my mind about the design plan after I had already ordered and received the cabinets. I can roll with the punches in situations like that. And since the cabinets with the rails are on the bottom, you can’t really see the rails. And with all of the doors and drawer fronts on, none of that is visible anyway.
But it does bother me a little more to have a cabinet with rails instead of a solid top in the middle section of this wall. I thought that I could just install them without the top rails. That way, when I open these cabinets, I’d just see the solid bottom of the top cabinets and not see any metal rails.

But unfortunately, that didn’t work. Can you see the problem?

The main problem is that without the rails, I have no way to screw this cabinet to the top cabinet. I could come up with a solution for that, but there was another issue. Without either the rails or the top solid piece, the back piece is too short and there’s nothing to stabilize it along the top edge. That looks even worse than the metal rails.
I’ve looked on the IKEA website to see if they sell those top panels separately, but I haven’t found them yet. I’ll have to call and see if they can help me. If not, I’m considering switching the order of the cabinets and putting the 30-inch cabinets on the bottom, the 40-inch cabinets in the middle, and the 20-inch cabinets on the top. That way, the cabinets with the rails will be on bottom and the rails will be less visible. Ugh! All because I wasn’t paying close enough attention when ordering.
But let me just state for the record that I love IKEA Sektion cabinets! I have been so impressed with them. They’re so easy to put together. They’re solid and sturdy once assembled. And you can adjust the doors and drawer fronts so that they’re perfectly spaced. So far, that has been the thing I’m the most impressed with.
The door hinges have three-way adjustments. You can use the three screws to adjust the doors left and right, up and down, and in and out.

And then on the drawers also have three-way adjustments! This is something I’ve never seen on ready-made furniture that I have to assemble myself. The drawer fronts can be adjusted in and out, left and right, and up and down. I love that!

Y’all know I’m a perfectionist, and I can’t stand doors and drawer fronts to be unevenly spaced. But with all of these different ways to make fine adjustments, you can get them perfect!
I’ll do the final adjustments on these once I get the doors sanded, trimmed, and painted. But just look at the near-perfect spacing between these doors and drawers!

I wish I had taken a picture of them before adjusting them. They were very visibly unevenly spaced, and it made my eyes twitch to look at them. But after adjustments, they’re just about perfect! (Although the left upper door needs to go up just a touch more.)
But overall, I’ve been so impressed with IKEA Sektion cabinets. I now have ready-made (pre-assembled) unfinished stock cabinets, completely DIY custom made cabinets, and IKEA Sektion cabinets in our home. They all have their pros and cons, and maybe one day soon I’ll write a post comparing and contrasting and listing the pros and cons of each. But for now, I’m thoroughly enjoying the IKEA cabinets in my studio.

Addicted 2 Decorating is where I share my DIY and decorating journey as I remodel and decorate the 1948 fixer upper that my husband, Matt, and I bought in 2013. Matt has M.S. and is unable to do physical work, so I do the majority of the work on the house by myself. You can learn more about me here.