I’m still working on my pendant light. *Sigh* This project may truly be my magnum opus by the time it’s all said and done. I worked all afternoon and evening on Friday, all day (with a couple of breaks) on Saturday, Sunday evening, and all afternoon and evening yesterday on this pendant light. And I’m only about halfway through.
I’ve gotten eight of the colors painted, which means that I have seven more colors to go. Thankfully, most of the seven colors remaining are for the smaller rings. And then I’ve gotten four of the colors attached to the lampshade rings, with a fifth color underway…
I’d guesstimate that I’m a little under halfway finished with attaching that fifth color to the lampshade ring.

The first color was the most difficult because I had to attach all of the spoons to the lampshade ring with the lampshade ring still attached to the cord. The only way to get that one off would be to remove the light from the ceiling completely, and then disassemble the light. I didn’t want to do that, so I stood on a ladder and attached all 88 of those spoons. It was a real pain. And then I had to group them and tape them in place so that I can attach the next ring without the spoons moving and shifting and getting in the way.

But I realized very quickly that it would be easier to disassemble the rest of the rings and work at my table. So while I had already assembled 12 of the 15 rings to form the frame of the pendant light…
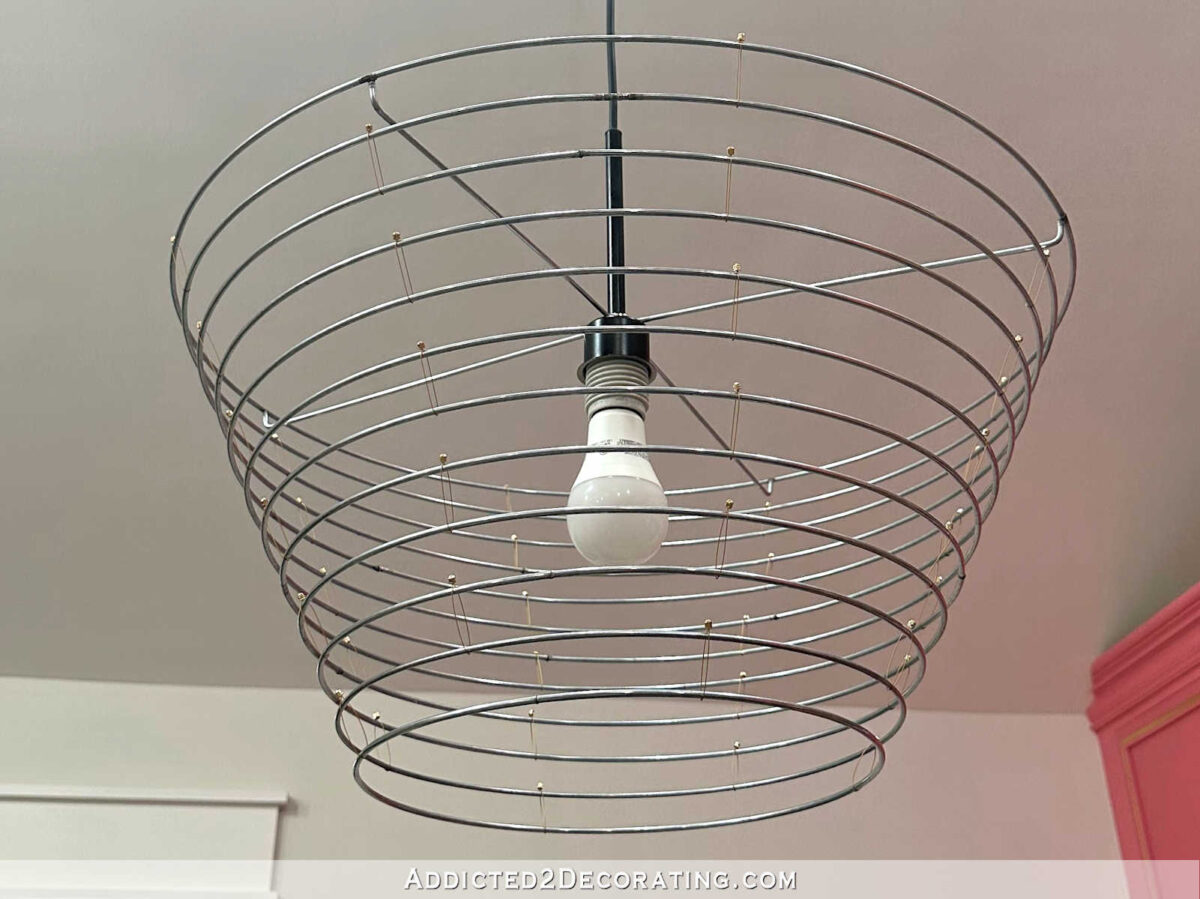
…I ended up disassembling the whole thing.
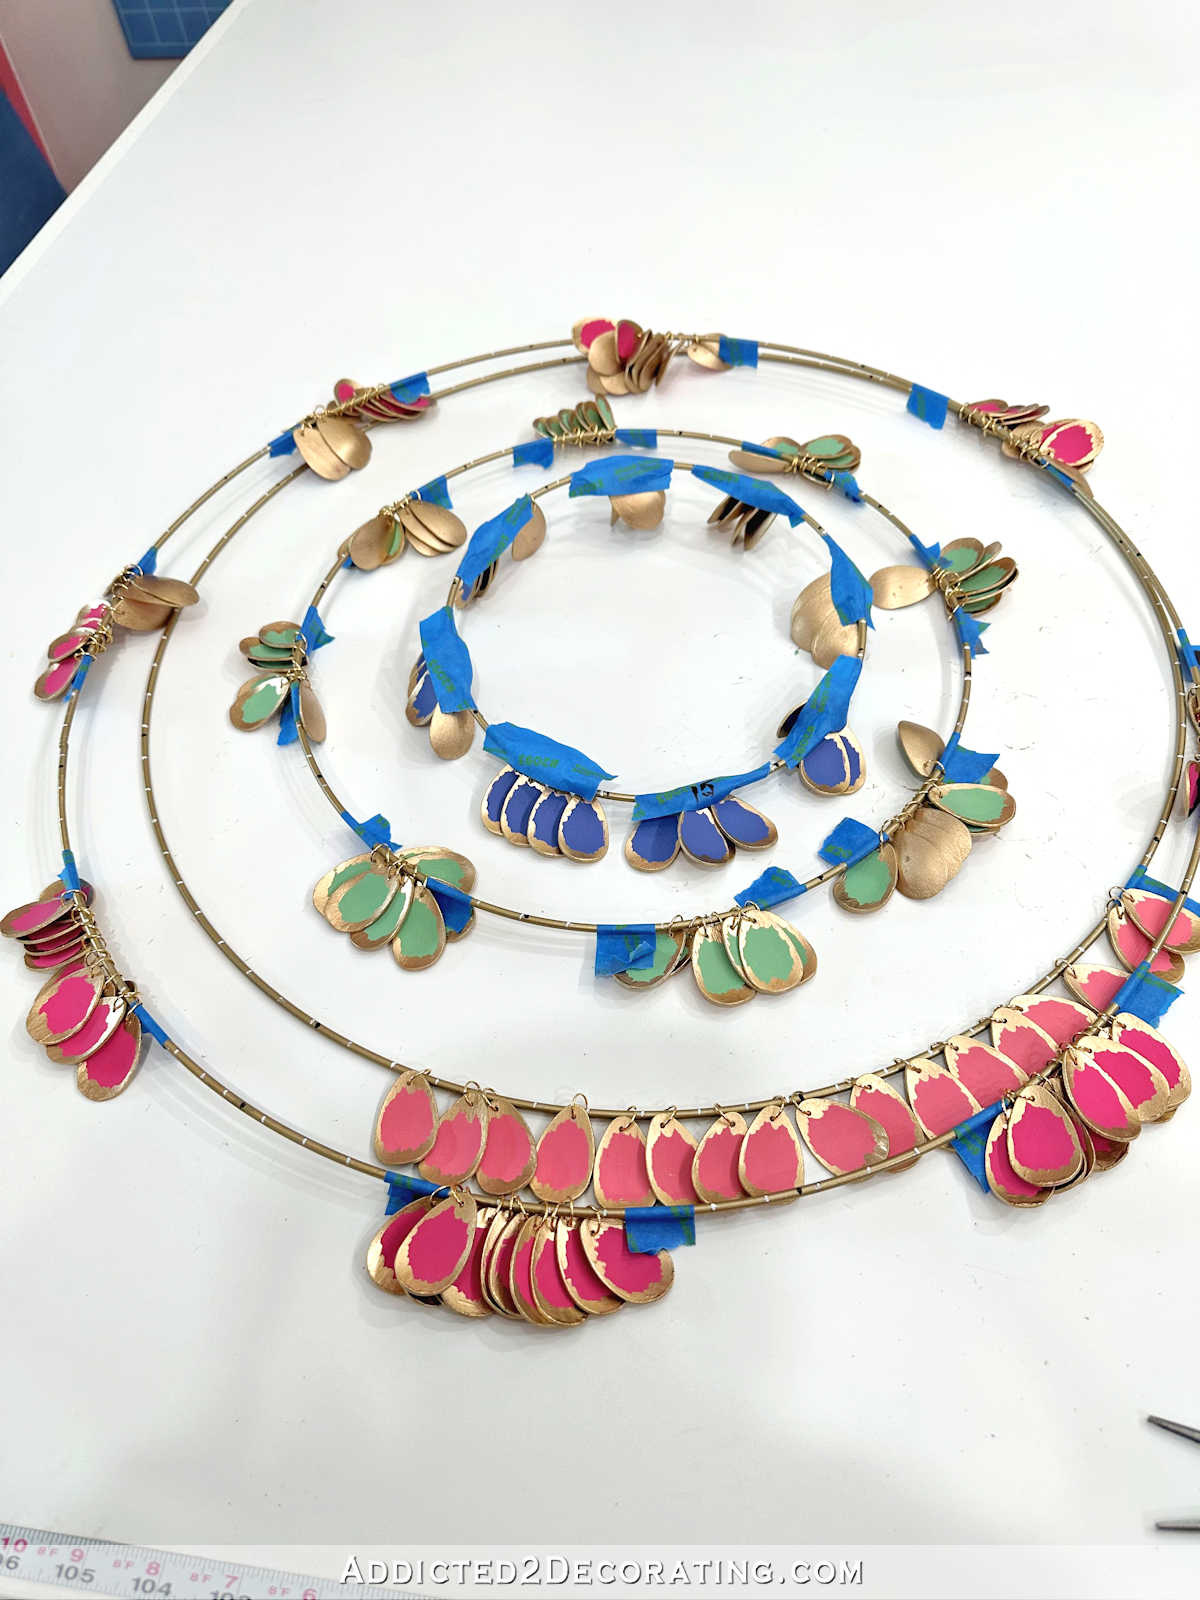
Here are the other colors I’ve finished, plus the one I’m still working on right now. There’s really no rhyme or reason to the order I’m doing them in except that I started with the two biggest rings, and then decided that I wanted to work on some smaller rings (which require far fewer spoons) so that I could get a couple of rings finished faster. I needed that sense of completion to keep me going.

And then I have these three colors that are ready to be attached to a lampshade ring…

One reason it has taken me so long is because I’m pretty much making this up as I go along. When I started, I had no idea how I wanted to paint the spoons. I mean, I knew that each row would be a different color, and I had those 15 colors worked out. But beyond that, I hadn’t worked out the details. So when I started painting the spoons, I actually had in mind that the backs would be solid white, and the fronts would be a solid color. After doing the first color, I realized that I didn’t like how that looked at all, so it was back to the drawing board.
It took a couple more attempts for me to finally land on this design, with the backs solid gold (liquid gold gilding), and the fronts a color “framed” with a messy gold border.

The next thing that took a great deal of time was figuring out how to keep the spoons in place, spaced 3/4-inch apart on the lampshade rings, so that they wouldn’t move, shift, and slide around on the ring. My first attempt was to try E6000 adhesive. I tried that on about 1/4 of one of the lampshade rings, and it didn’t really work out. So then I had to peel all of that adhesive off and repair the paint on the lampshade ring (which I had painted gold). And I had to come up with another idea.
My next idea was to use hot glue. That was a mess, and I didn’t even get 1/4 of the way around the lampshade ring before realizing that hot glue was a horrible idea. It’s too messy, doesn’t dry completely clear, and it leaves strings of hot glue everywhere like spider webs. So for a second time, I had to peel off the glue and repair the paint on the lampshade ring.
I finally landed on the idea of super glue, but I also decided that I needed to attach all of the spoons on all 15 rings, and then reassemble all 15 rings to each other, and then the final step will be to super glue the spoons in place on the lampshade rings, starting with the bottom ring and moving towards the top. So at least two hours of my time on Saturday were taken up with me trying out different ideas, making repairs from the failed ideas, and coming up with a plan that would actually work. I’m confident that my new plan will work.
I love projects like this. Don’t get me wrong. I also love a quick and easy project that gives me that close-to-immediate gratification that we all need every so often. It’s very satisfying to start a project, and a couple of hours later, have a pretty piece of artwork that can be displayed.
But you’ll almost never wind up with something truly spectacular in just a couple of hours. That’s not to say that it never happens. I think the focal wall in our bedroom is pretty spectacular, and that was a surprisingly quick and easy project. Tracing the design onto the wall in two different colors of acrylic paint pens was super simple, pretty fast, and has a big, bold impact in the room.

But every other project I’ve done that I would put into that “spectacular” category took time. A lot of time. And patience. And trial and error. And perseverance.
To me, there’s nothing more satisfying than taking on a huge project, sticking with it to the end, and winding up with something that I can be truly proud of. Those are the projects that teach me perseverance and patience. Those are the projects that teach me new skills. Those are the projects that sharpen my problem-solving abilities. Those are the projects that teach me how to think through and create a process and a plan from beginning to end. And those are the projects that almost always get the biggest reaction from people who visit my home for the first time.
When people see my home for the first time, it’s not the trim or the curtains that they comment on the most. It’s things like this piece of artwork…
It’s so interesting watching people as they try to figure it out. They get close to examine the details. Then they stand back to get the whole picture. And then when I finally tell them that it’s made of 6400 small individual wood plugs that are used to cover screw holes in furniture, each painted separately to create a pixel-type picture, they’re just amazed. It’s one of the projects that I’m the proudest of, and it took a lot of time, patience, and diligence.
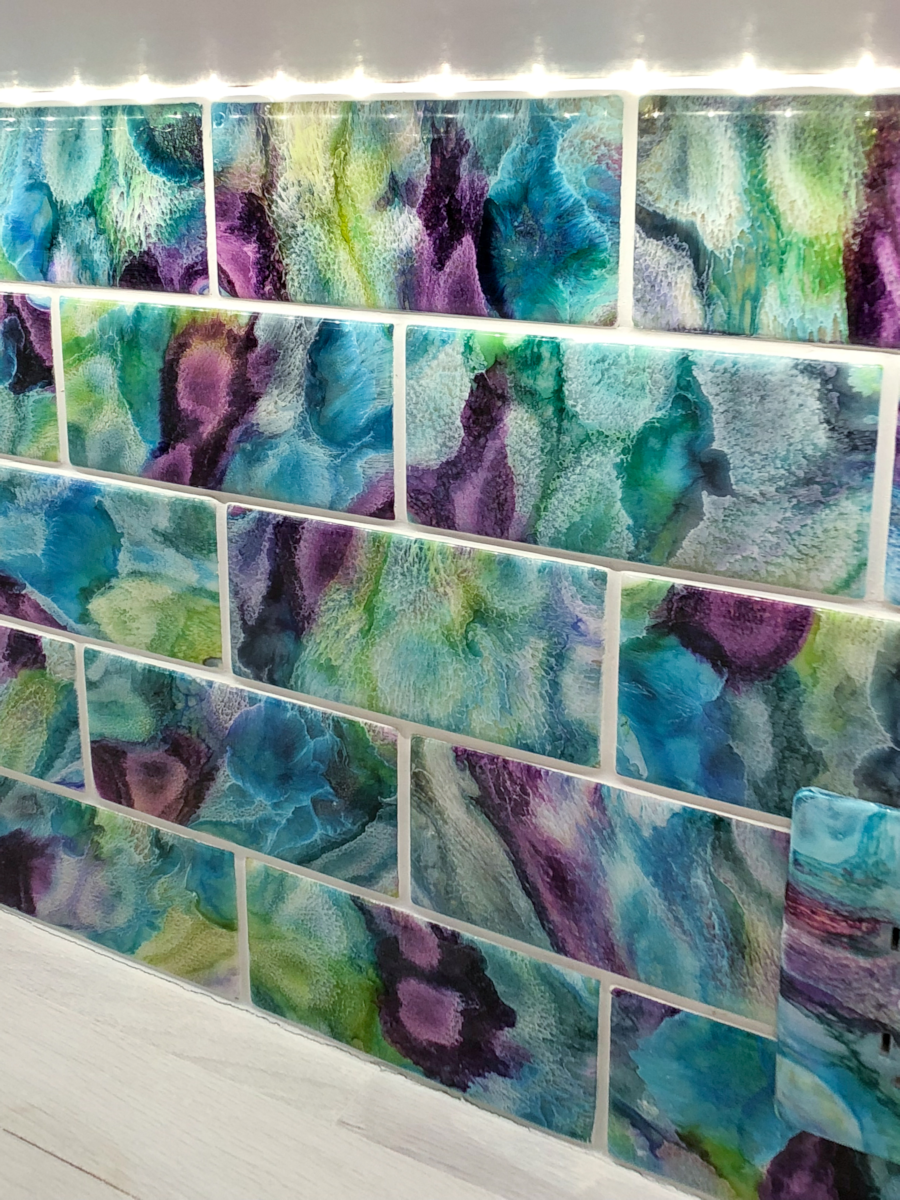
And it’s things like the tile in the pantry that catch people’s attention, which is another project that took a great deal of time from start to finish.
So while I do love the quick and easy “immediate gratification” types of projects, and I think we all need those from time to time, I also find a tremendous amount of value in these projects that seem to drag on forever and really take a lot of perseverance and diligence to finish. I think we need both in our lives. I grew up the daughter of an artist. My mom did amazing oil paintings, and there was nothing quick or easy about her work. She would work for weeks straight on one painting, and it paid off. Her work was truly amazing, and people would stare in amazement at her paintings hung on the walls of our home. While I’m not an oil painting artist, and my talents are in other areas, she taught me a lot about taking the time needed to make sure a project is done right and done well. It was an invaluable lesson to learn from watching her artistic process all throughout my childhood and younger years.
I think we can learn a lot from both types, but I can also say that there’s nothing quite like that feeling of satisfaction when I’ve finished a huge, time-consuming project. And hopefully, I’ll have that feeling in the next few days when this pendant light is finished.

Addicted 2 Decorating is where I share my DIY and decorating journey as I remodel and decorate the 1948 fixer upper that my husband, Matt, and I bought in 2013. Matt has M.S. and is unable to do physical work, so I do the majority of the work on the house by myself. You can learn more about me here.