My witch hat tutorial has been so popular over the last few years, and I’ve absolutely loved seeing all of your creations. This year, I decided to make it even easier and give you a free witch hat pattern that you can download and print from home! I also had it graded as a kids size, for the little ones in your lives. And if you watch my video, you can even see how I made a teeny tiny one for my kitties.
This is a super simple pattern that is perfect for beginners. It can be customized in any way you want. Sometimes I leave them simple, sometimes I add flowers and tulle. I’ve added spiders, sheer overlays, netting, you name it! I often use cost-effective felt. I also love using canvas and sturdy velvet. Any fabric can work, as long as a heavy interfacing is attached. That will help give it shape.
Download your free witch hat pattern
You can download your free pattern below, on regular printer paper. Just piece together as the diagram shows, tape, and cut out. Important: Make sure you are printing to scale.
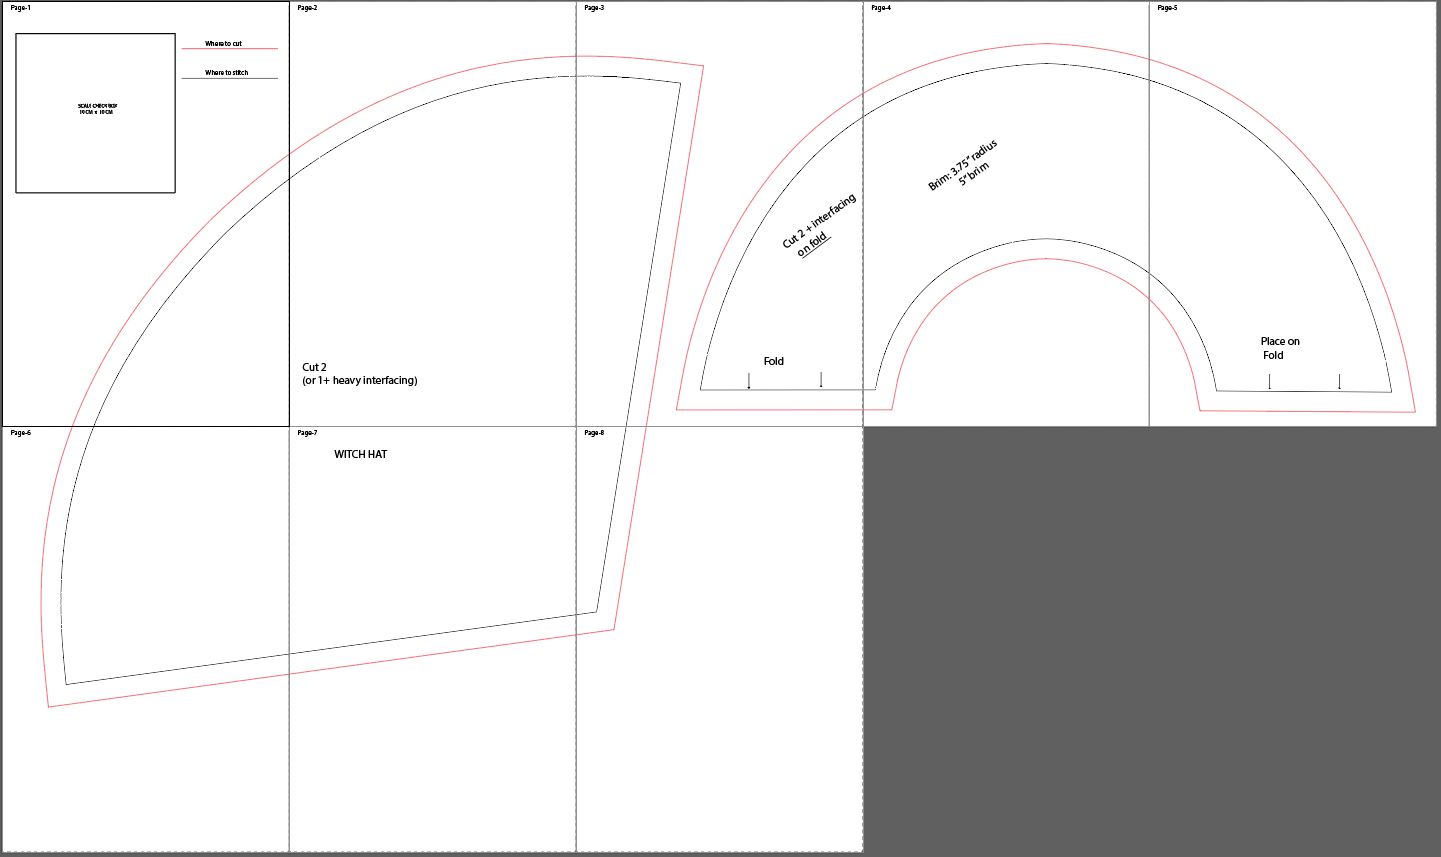
Once you print out the adult witch hat pattern, lay out the pages as shown. Fold and match up on the dotted lines, tape together, and cut out to make two pieces. Measure the example square to guarantee it was printed to scale. Cut the pattern on the red line, sew where the black line is (1/2″ seam allowance), and you have yourself a simple witch hat.
Kids size witch hat pattern
I also made a kids size! Download that, below:
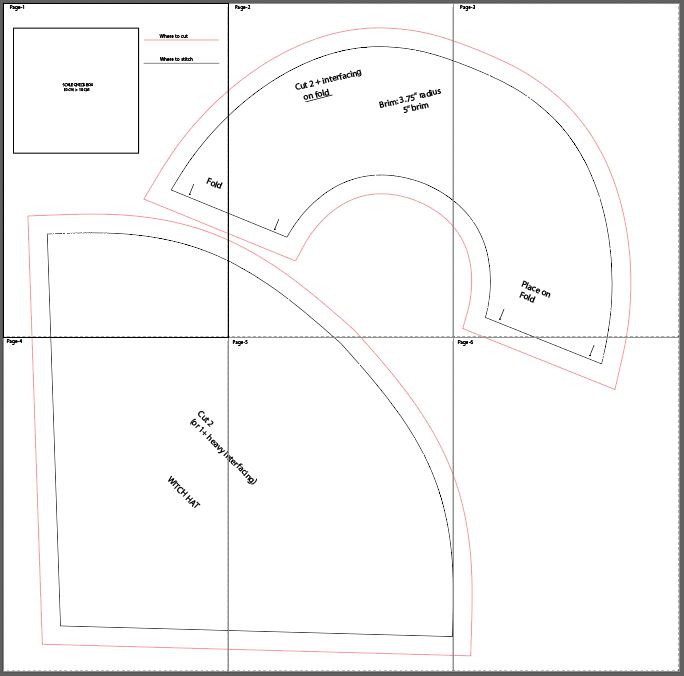
This is the layout for the kid’s witch hat. Match up on the dotted lines, tape together, and cut out the pattern. I prefer to fold one dotted line edge and overlap it to match the corresponding edge, rather than cutting.


Need more help? Watch my video
Once you have your pattern printed and pieces cut out, you can use my witch hat tutorial video as a guide. I also have a step by step photos tutorial coming soon, if you can wait! But I promise, it’s easy enough to do on your own.

If you make it, share it!
Please tag me in your witch hat photos and videos. I’d love to see your creations!


